
Baroque Violin pegs
Baroque Violin pegs
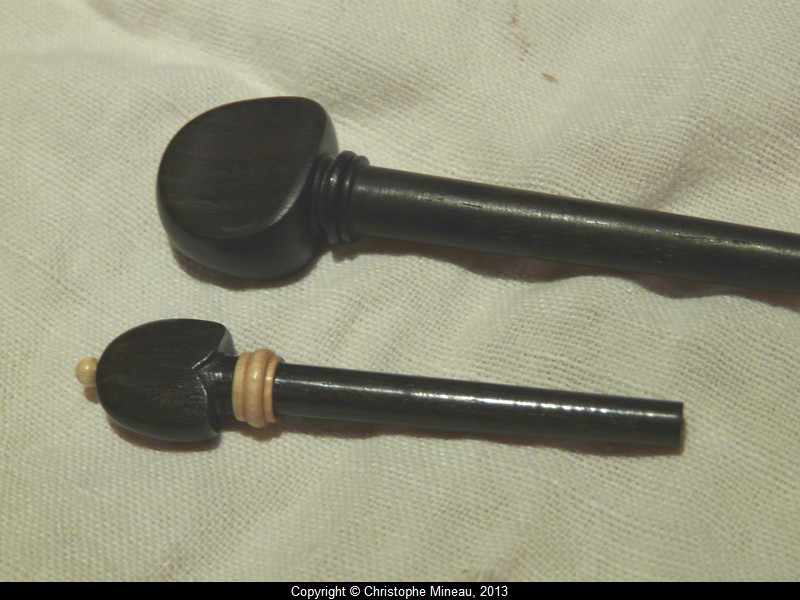
Table of contents :
Violin pegs in baroque style

Here are the steps for the making of baroque style pegs, with a heart shape.
These pegs are made of two timbers : ebony and boxwood.
They are the pegs for my Dancing master pochette / violin kit. Their size is minimal, they are designed for a 1/64th size violin.
The biggest diameter of the shank is 6mm.
Here are some pictures depicting the making process :
We start with an ebony blank, with a rectangular section.
Section 15x11, length 65.
The shank is rounded with a roughing gouge.
|
 |
|---|
The piece is reversed in the chuck..
Shaping of the head with a spinning gouge, then with a 6mm round skew.
Width 14mm, heigth 13 mm along the axis.
The shape is a bell.
|

The bottom of the bell is lightly rounded.
|

Not shown here, end drilling at diameter 1.5 mm, with a center drill.
With support of the live center, digging of the bottom of the bell with the spinning gouge, 6mm, closed angle.
|

Shank diameter turned down to 6 mm. Use of a spanner as a jig.
| 
Smoothing with a round skew chisel. de 6mm. Light cone. do not try to reach the final size.
|

Making of the boxwood parts.
Roughing of a piece of boxwood, well dried.
|

Boxwood made round.
|

Not shown, drilling at the end of a hole, 6mm diameter, 30 mm length.
Parting of the 4 rings, 4mm wide, 12mm diameter..
|

Shaping of the little marbles.
Diameter about 3mm, little shank diameter is 1,5mm.
Use of the flute of the parting tool to shape the ball.
It is tiny !! 
|

the marble and its little shank. 
Use well dried boxwood.
|

Mounting of the ring, 2mm distant from the bell, glued with CA glue.
|

Shaping of the ring, with a little bead in the centre, using the shaping tool, like for the marble.
|

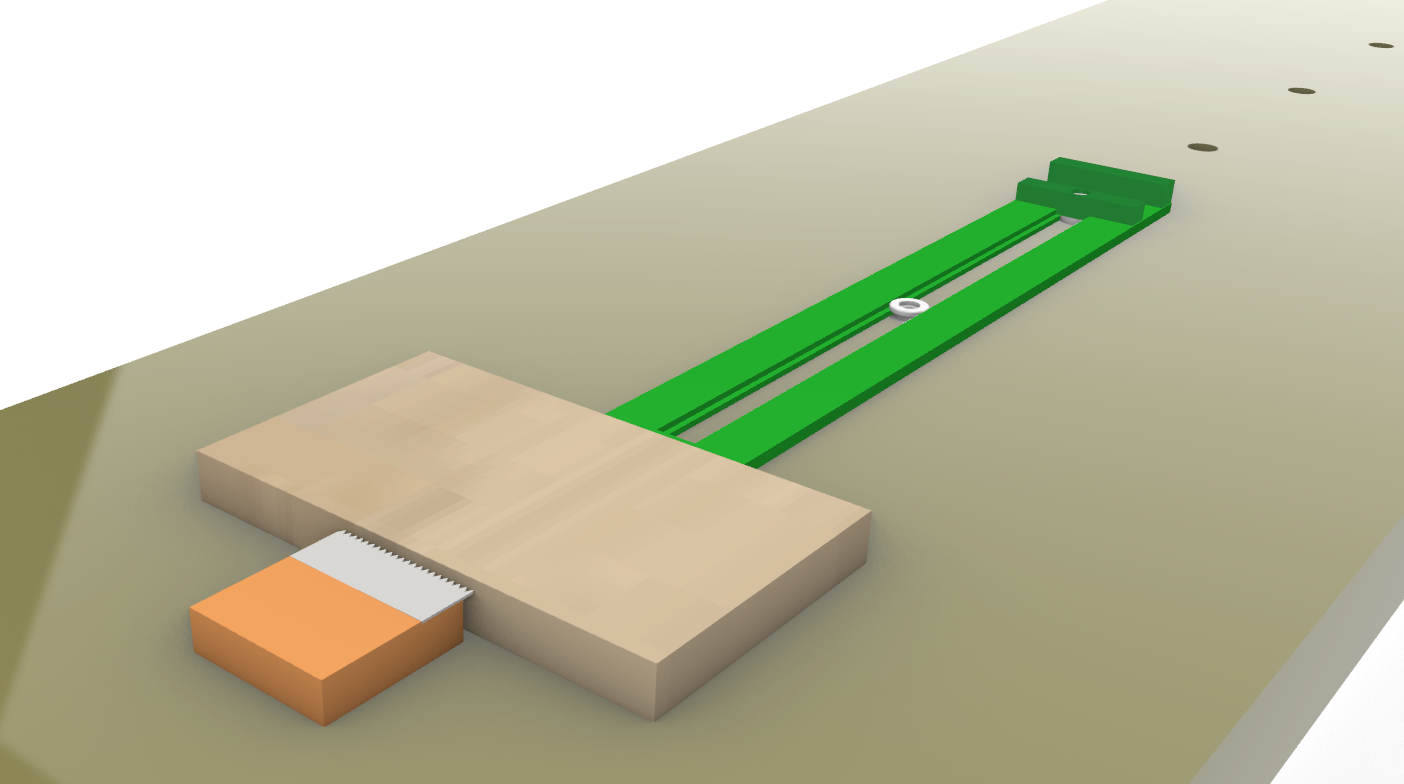
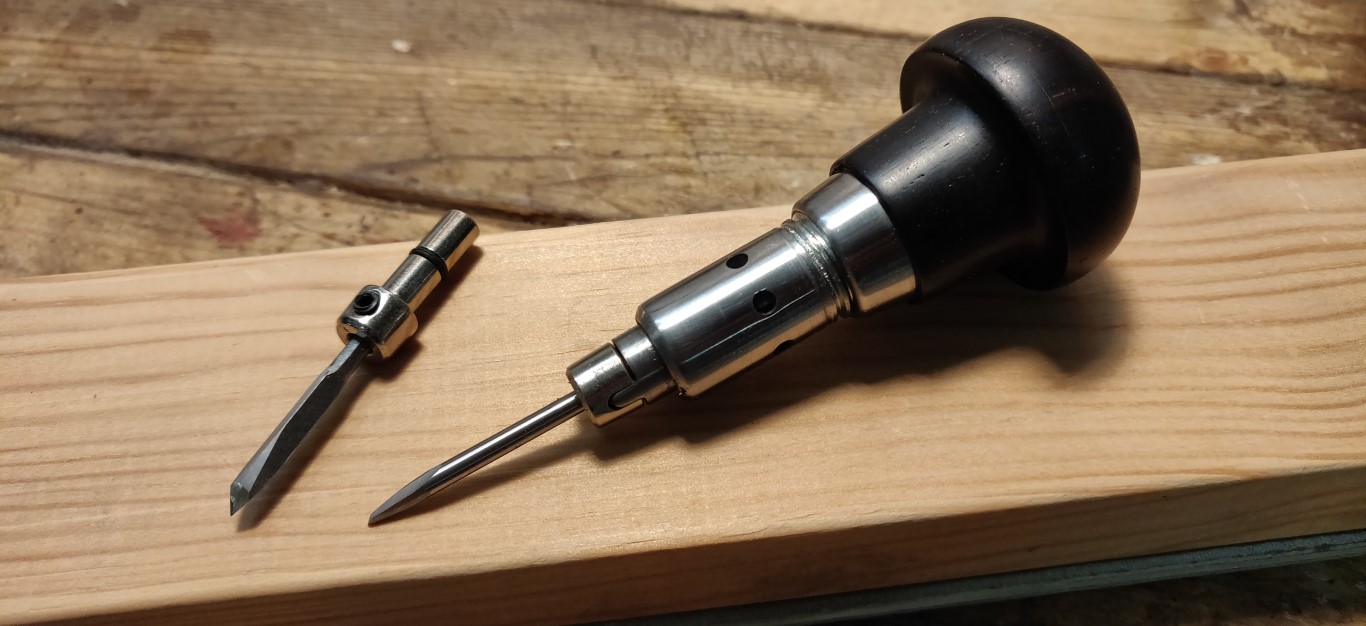
Making of a custom peg shaver, mated with the reamer I will use (1:30 taper).
In a piece of hardwood, drill, then ream two conical holes with the violin peg reamer (not shown here). Ream the hole on the right lightly less deep than the left hand one.
On one of the holes, cut with the band saw a passage throw the hole, with a 30° tilt plane, in order to fix the blade.
The saw line enters the conical bore, no matter what the angle actually is.
Use of a spoke shaver blade, fixed with a screw in the center.
The blade must be very sharp. The blade must just overlap the edge of the tilted plane, where it enters the conical bore. This line is a line which generates the cone, so adjust parallel and close to this line.
|

Just need to put the peg in the hole, and turn like a pencil.
Use the hole on the right to verify the adjustment.
|

You can see here the tiny overlap of the blade over the edge in the conical hole.
|

The peg evnentually cut.
The biggest diameter of the shank is 6 mm.
|

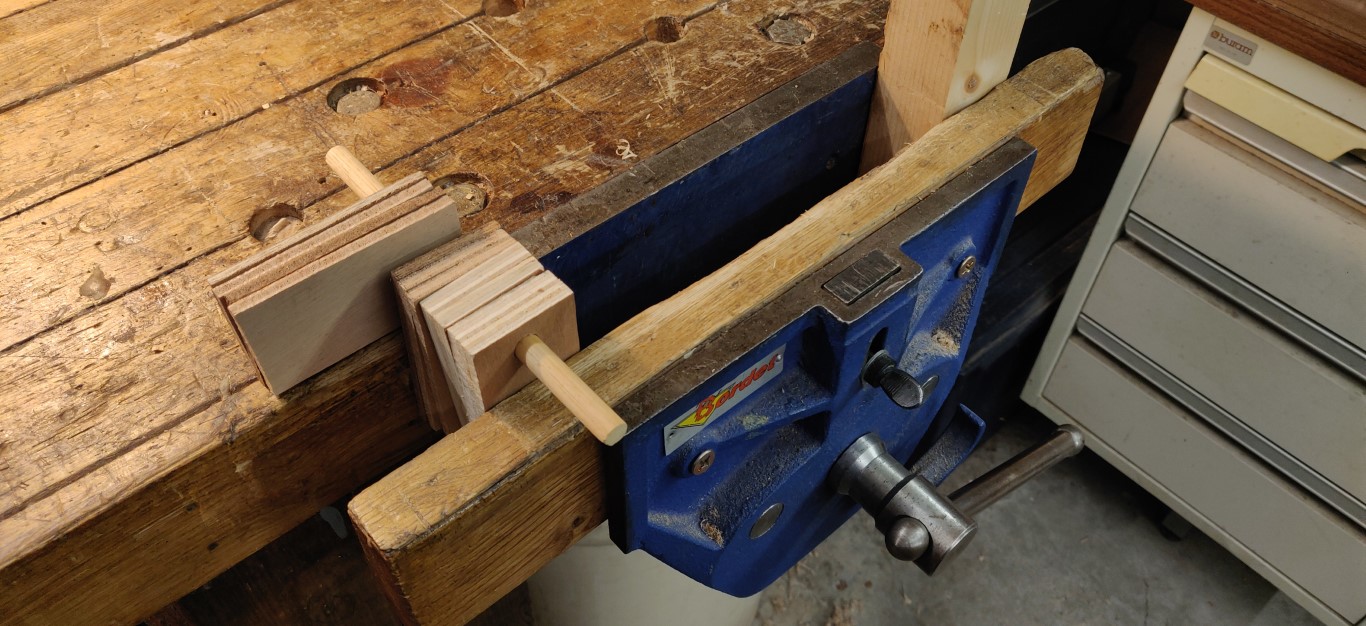
Making of a little jig with a stop, clamped on the table.
Gouging of the head, to shape the edges rounded towards the side. Lower the thickness :
5mm on topt, 7mm at bottom of the bell.
|

Another jig, for the rest of the work, at the edge of the table.
|

Finish the shaping of the head with an abrasive band.
Be careful to keep well symetric between the two faces.
|

Shaping of the heart with a carving V gouge.
|

Finish of the point in the middle of the heart with a knife.
|

Polishing on the wheel, with brown compound.
|

It is shiny. You do not want to leave any trace of gouging or sanding.
|

The little marble is settled with CA glue.
A last visit to the wheel, and it is finished.
Here, the 1/64 peg, beside a standard 4/4 violin peg.
|

Here, the 1/64 peg, beside a standard 4/4 violin peg.
|
Boxwood / ebony / boxwood
|

Side view.
|

Ready to install.
|

Do not hesitate to leave me a message here under !
Up to your gouges,
Christophe


Older readers comments