Fretboard Design
Fretboard Design
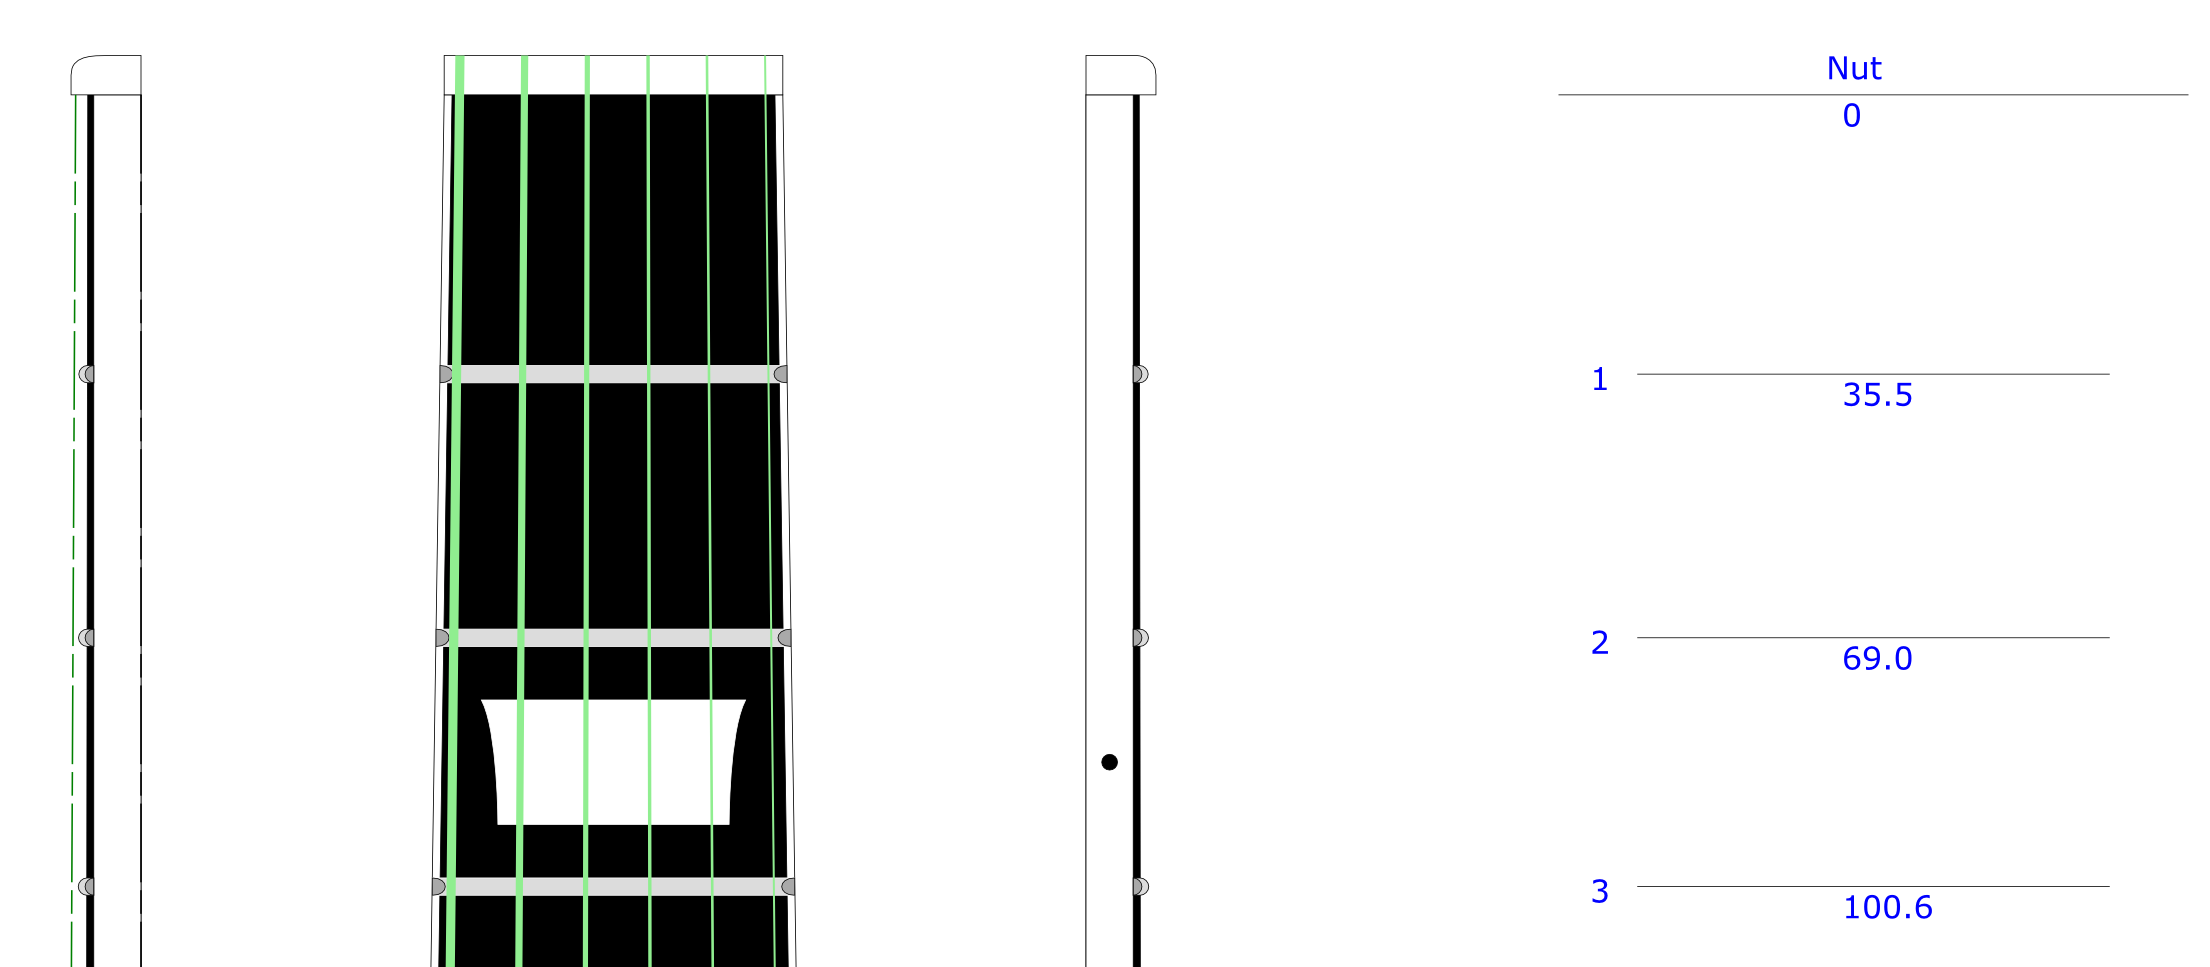
Table of contents :
FBDraft : Fingerboard- String layout - Action - Neck Angle
Why this calculator
There are already several fret calculators here and there around the Web.
The “FBDraft” tool I propose here goes one step beyond, it features :
- Automatic drawing of the set fingerboard-frets-nut-bridge-string in a realistic way, compliant with the technical drawing standards, and with a SVG output format, which is directly possible to import in CAD softwares (QCAD, AutoCad for instance).
- A front view (orthogonal in the FB plane), right view and left view, as well as a draft view that gives the fret placement.
- Calculation of the fair spacing of the strings on the nut and bridge, for all kinds of string configurations, taking into account the gauge of each string; the string number can be variable, single strings, double string courses, possibly different gauges for the strings of a same course.
- Drawing or not of a binding around the FB.
- Drawing or not of inlays, of different shapes and size, including on the edge of the FB.
- The exact layout of the string angle with respect to the FB plane, taking into account the wished action.
- Layout of the bridge, top plane and neckangle.
- It also works on fretless instruments like the violin. You just need to enter a null number of frets.
This is a tool I have developed for my own needs, following an original idea from Christophe Grelier, and I am happy to share it with the luthery community.
Please, leave me your comments and remarks as well as suggestions for any evolutions !
Help would be welcome to improve the set of preset instruments, fell free to send me data, I will add them to the list.
You can comment at the bottom of the page, no need for subscription.
How to do ?
The principle is simple, you only need to fill the form below with the
parameters you wish, click OK and the drawing will immediatly appear on the
screen.
Then you just have to use the “Save as…” function of your browser, carefully
selecting the SVG format.
Drawing in SVG format
The output drawing is in the SVG format, but what can be done with an SVG file ?
-
The SVG format is directly displayed in your Web browser
-
It can be opened in Inkscape. The SVG vectorial format is the native format in Inkscape.
If you only wish to print the fret template , please see the tutorial here below for a 1:1 scale printout on several A4 sheets starting from Inkscape. -
Finally, the sketch can be imported in a CAD software and it can be the starting point for the complete drawing of an instrument (it is actually the reason why I created this software tool). This drawing can also be easily opened in a CAD software and can serve as a starting point for the full drawing of the complete instrument.
Fill in the form : Instrument Parameters :
How to print in full-size the fret template.
If you don’t wish to use a CAD software, it is possible to print in 1:1 full scale the fret template, on several pages with your simple home printer. You will be able to reassemble the sheets in order to use the template directly in the shop, glued on the wood.
Here is the method :
-
Fill in the form above with your data, and once you got your drawing, save it on your computer as an SVG file. In your Web browser, on the sketch, right click, “save as …”, and save the file with an SVG extension. The default name is “Fretboard by 4choeurs.svg”.
-
Install, if not already done, the free vectorial drawing software Inkscape.
-
Inkscape, to date, doesn’t manage properly the multi-page printout. The tip is to use Inkscape to export the SVG drawing in pdf format.
First, open your file in Inkscape.
In Inkscape :
- File menu : Open => Fretboard by 4choeurs.svg -
If you wish to print the fret template only, it is time to delete the left part of the sketch. :
In Inkscape :
- Un-zoom pressing the Ctrl key and actioning the mouse wheel
- Select the left part that you don’t want to print, using a rectangular selection box.
- Delete it (Del key)
- Possibly, select the part you want to keep and center it on the page (Select, click, and drag and drop)

-
Export in pdf format :
In Inkscape :
- File menu / Save as … ==> Name the file, and in the Type field, choose “Portable Document format (*.pdf)”

- In the popup window that appears for pdf options, choose resolution = 200 ppp

- Close Inkscape -
There are several pdf readers that allow multi-page printouts, I propose to use one of the best, according to me, which is, PDF-XChange.
It allows to print any document in multi-page, managing the overlay and printing cut-marks, which is mandatory for an accurate reassembly.
- Install the free software PDF-XChange Editor or PDF-XChange Viewer on the [editor’s site, Tracker Software](http://www.tracker- software.com/product/downloads)
- Open the pdf document
- Print: File Menu / Print
- In the print options window that opens, choose the following options :
- Pages Range : all
- Pages placement and scaling / Type : Tile All Pages
- Pages placement and scaling / Page Zoom : 100%
- Pages placement and scaling / Auto-center page in Composition
- Pages placement and scaling / Show Cut-marks on Sheet

- You obtain this way several sheets, 1:1 scale, that you only have to re-assemble with scissors and tape, thanks to the cut-marks left in the corners of each sheet.
Important advise for gluing a template on wood :
The glue moistures a lot the paper, which will tend to expand and to distort, which may ruin the dimensional accuracy of the template.
The tip is to apply the glue preferably on the wood, and then to apply the paper on the wood.
I personally use gum Arabic, applied with a brush. This glue is thin, is very well spread on wood, and is easy to remove simply humidifying the paper with a sponge.


Older readers comments