
Telescopic hollowing tool
Telescopic hollowing tool

Table of contents :
Telescopic hollowing tool
Here is a woodturning deep hollowing tool inspired from the famous Rolly Munro hollowing system. [](https://www.woodworkersguide.com/2009/04/16/the- rolly-munro-articulated-hollower/)
It is basically long handle, hollow, in which slides a very stiff bar allowing to reach the bottom of a deep vessel, and supporting a great cantilever beyond the tool rest. It also brings inertia in order to absorb the vibrations.
Contrary to the Munro, I preferred using a square section bar, in order to apply better pressure onto the tool rest, preventing the cutting tip to be caught by the rotating work piece.
That tool design was inspired by an [article I found in the
Homematetools.net](https://www.syzygywoodworks.com/news/2013/09/13/pvc-gouge-
handle-with-aluminum-insert/) encyclopedia, showing a handle made of aluminium
and PVC.
Obviously, I’m proposing here to make the handle out of wood instead of PVC
 .
.
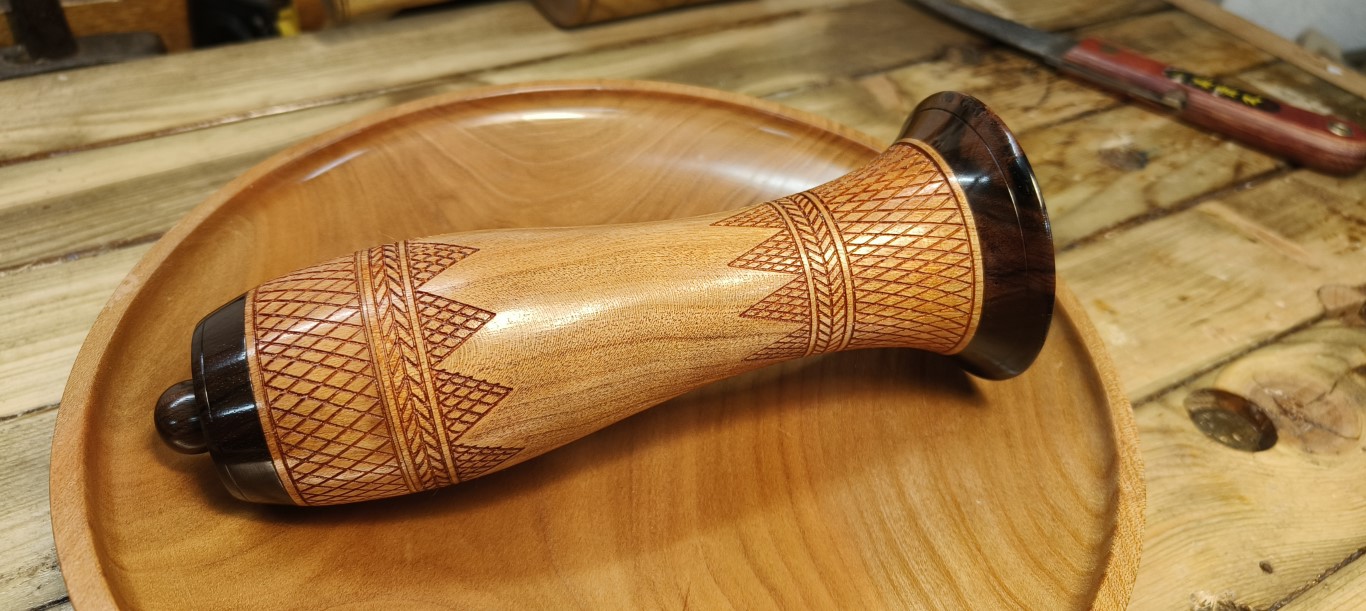
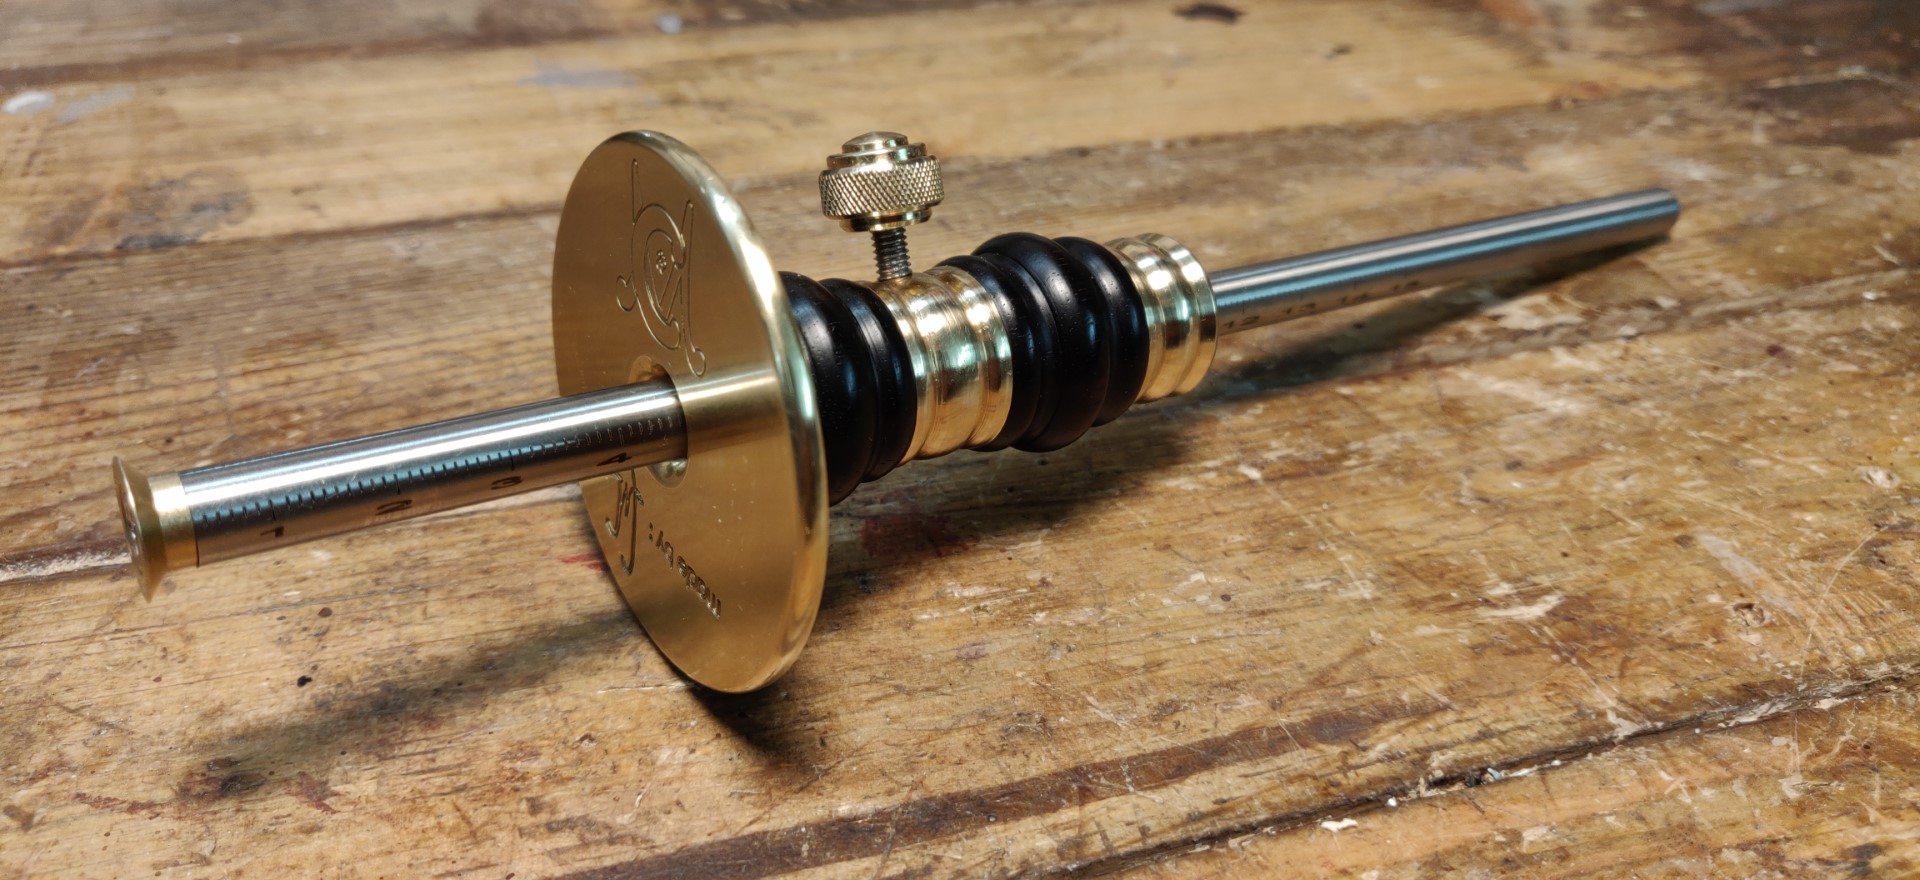
Here is the handle, finished. The length is 53 cm, the diameter of the alu. rings is 40mm, and the steel bar section is 16mm x 16mm.


-
Like in the solution above, I used aluminium rings. I bored the inside on the metal lathe, and the external profile was hand turned on the wood lathe, using an HSS gouge.
As a general rule, aluminium can be easily worked using woodworking tools (lathe, router, table or band saws, rasp, chisel, etc …)
The square bore was made with a rasp and a file. -
For the wooden handle, I started from a round pole, from yellow exotic wood (ramin ?). I split it, removed the center strip, glued it back, and turned it round on the wood lathe.
The finish is oiled.


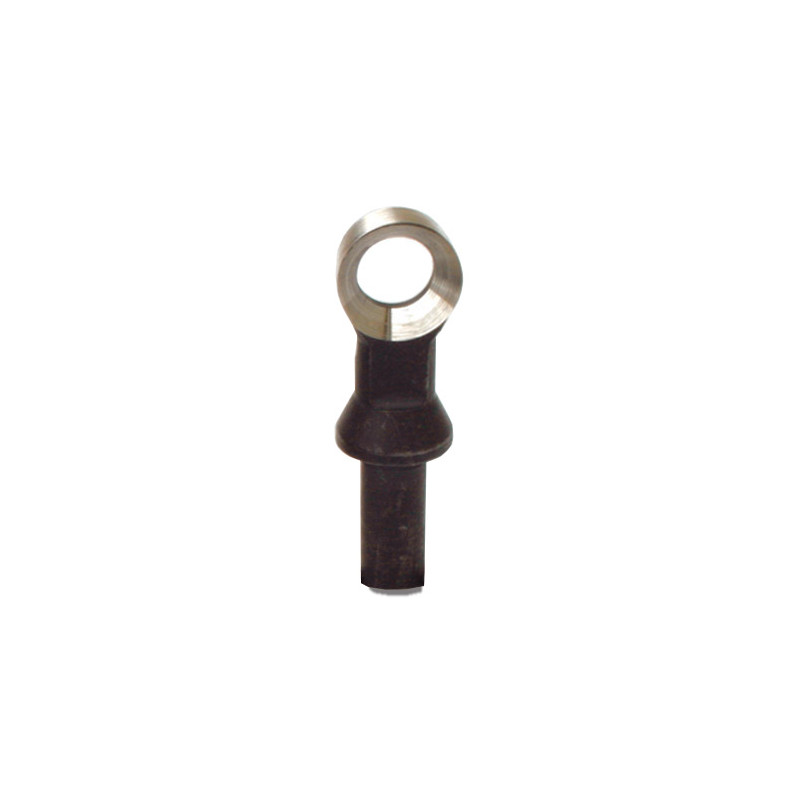
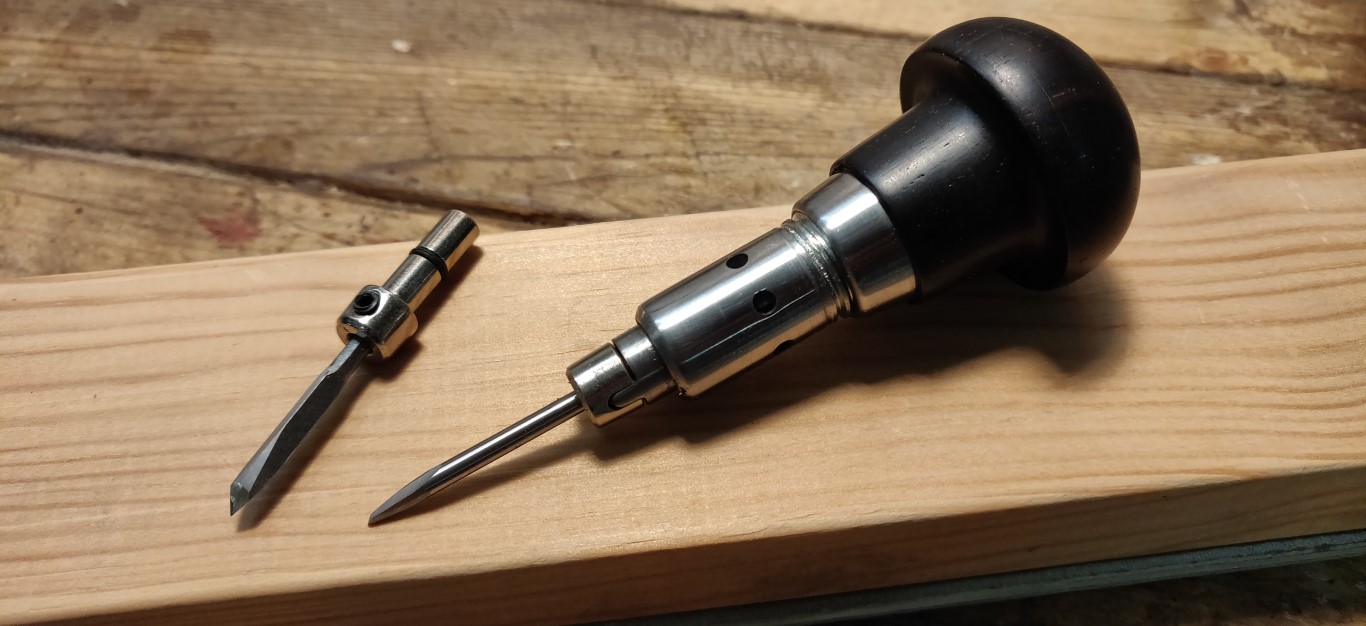
Concerning the cutting head, I decided to use both ends of the bar, with two different ways of attaching the cutting head :
- On one side, an 8 mm hole is bored, with a couple of set screws, allowing to attach all sorts of accessories like for example :
-
Shaped HSS inserts , custom made from jointer or shaper blades.


-
The “Otello” insert
Notice that that system allows to easily set the cutting angle of the insert.
The insert is itself slightly tilted towards the front on its support.


-
It is also possible tu use a router bit, with an 8mm shank, like can be seen in that video.
(Thanks Georges Gonzalez for the idea !)

-
It is also possible to use a cutting ring like the Oneway (c) “Termite” :
[](https://aupresdemonarbre-tournagesurbois.com/termite- oneway/569-anneau-termite-13-mm.html)
(Photo credit : “Au près de mon Arbre”)
- At the other end, I have milled a flat platform and drilled a threaded hole, in order to attach some HSS scrapers, custom made out of planer blades or like here from a shaper blade, reversely mounted.


If need be, in the future, I will be able to use that side in order to add some articulated links to make a curved head, like the original Munro.


Please, feel free to leave me any comment here, or on Facebook, or yet on HomemadeTools.
Christophe


Older readers comments
Hello from benoit