
Vacuum press system
Vacuum press system
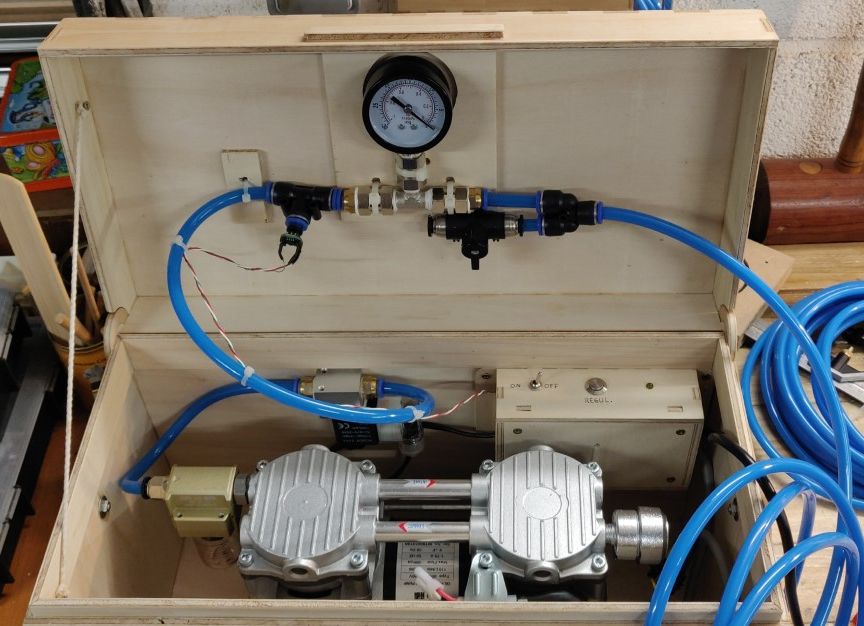
Table of contents :
Vacuum press for veneering
Here is my vacuum pressing system:
-
an oil-free vacuum pump, “900V” model: 110L/min, -90Kpa (= -0.9 bar / -13 psi), 360W
-
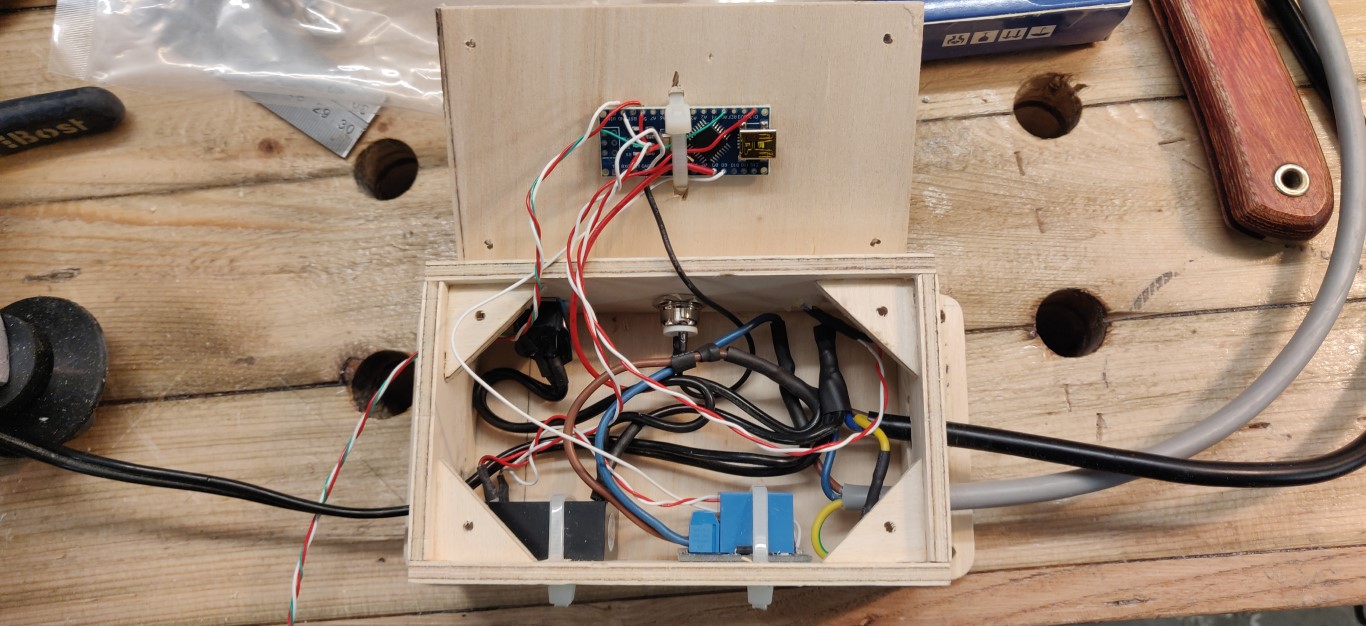
a homemade vacuum control device including:
- Solenoid valve
- Relay
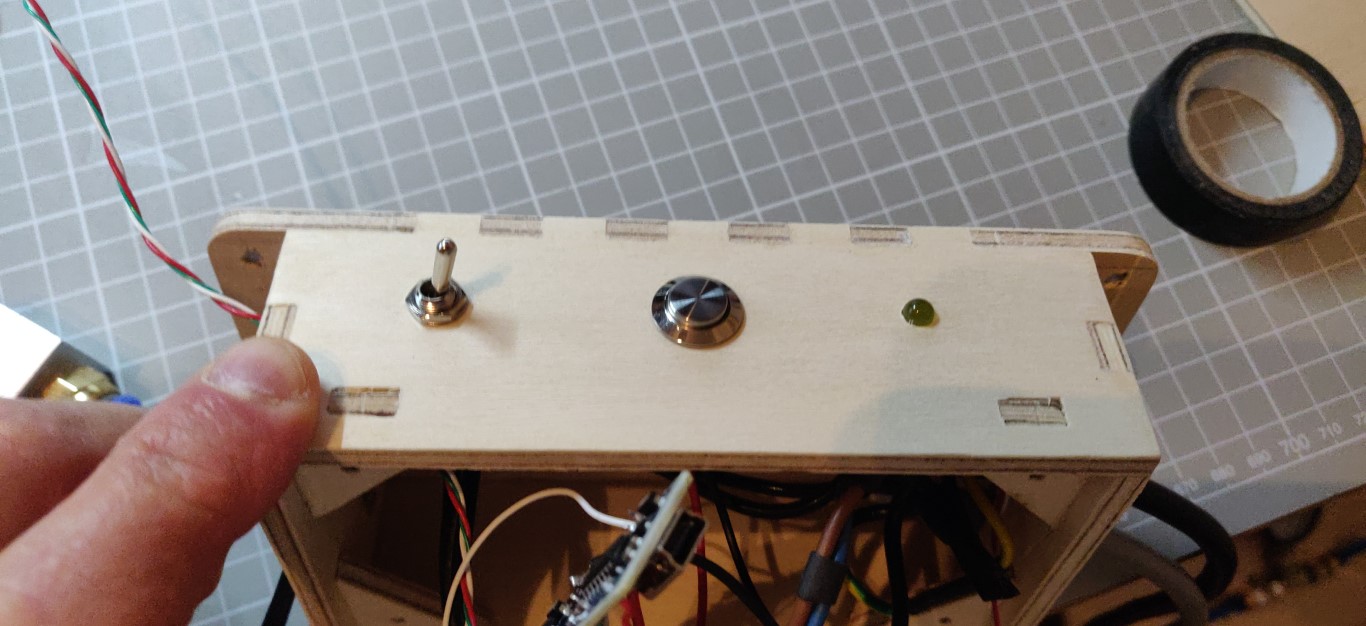
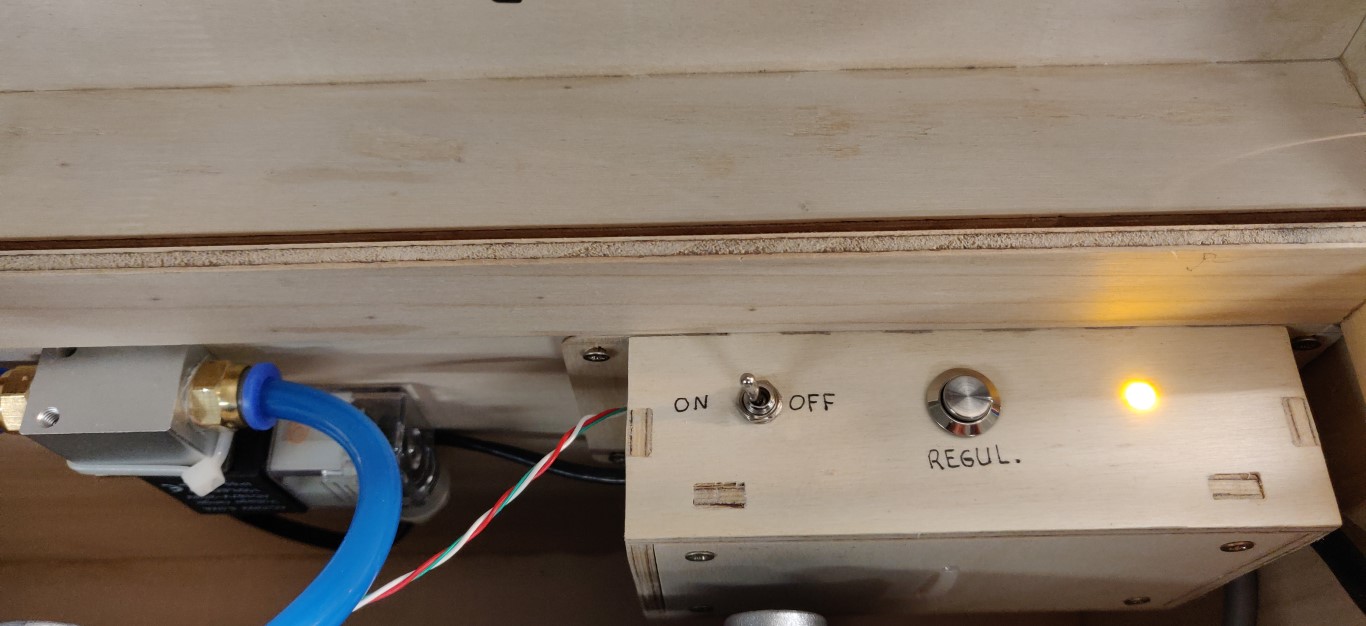
- Regulation start/stop button
- LED
- Control arduino board
- homemade box for this control block
The purpose of this device is to maintain the vacuum, and to stop the pump as long as the vacuum level is maintained and to restart it when necessary.
-
a transport case for the set
-
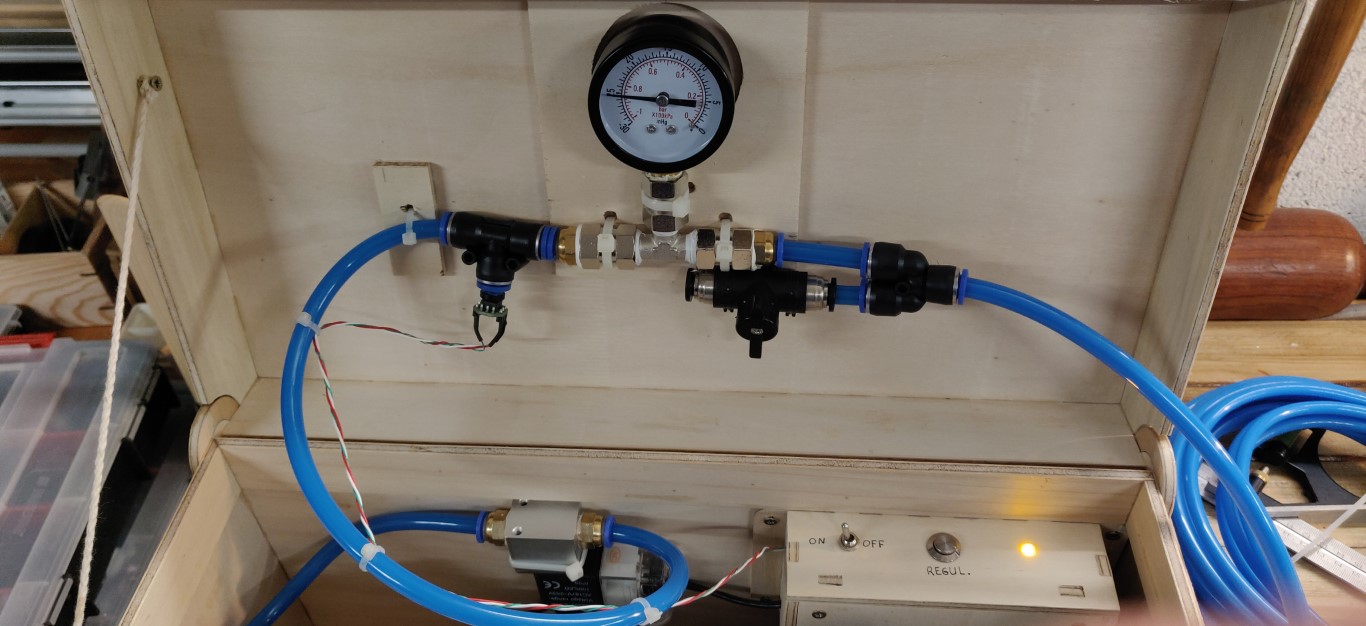
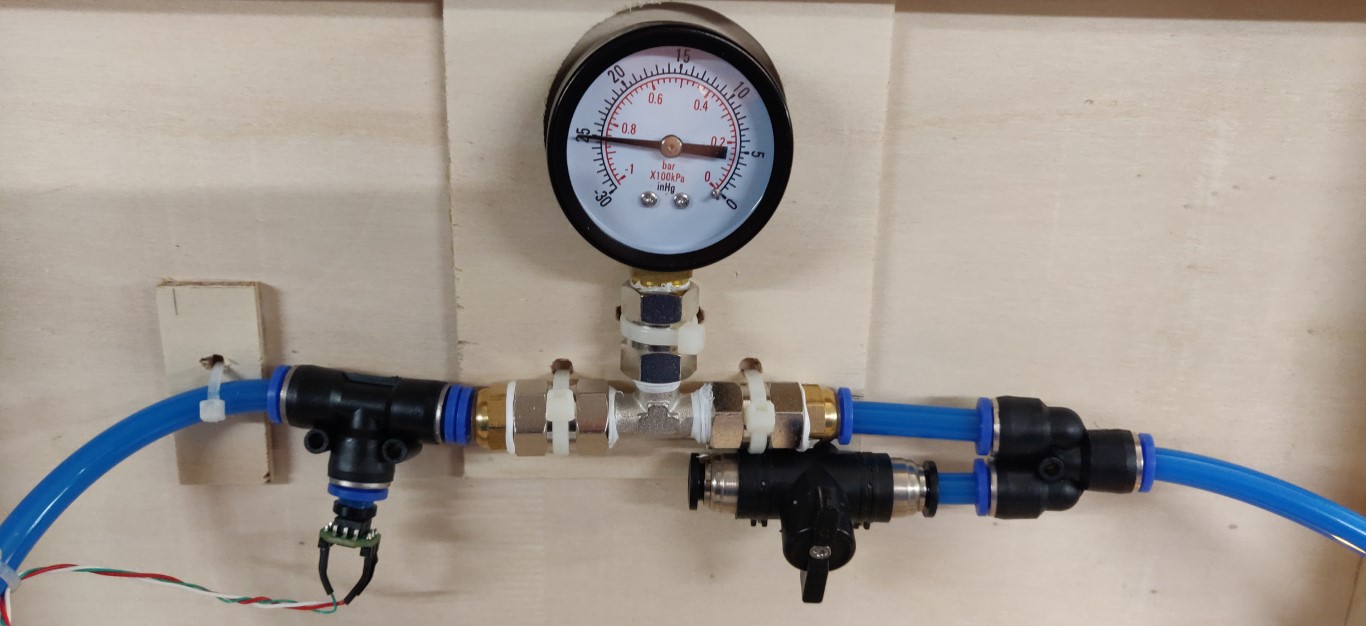
a manometer
-
an relief valve
-
a homemade connector to connect the pressing bag
-
homemade pressing bag, made to measure or based on a commercial vacuum storage bag
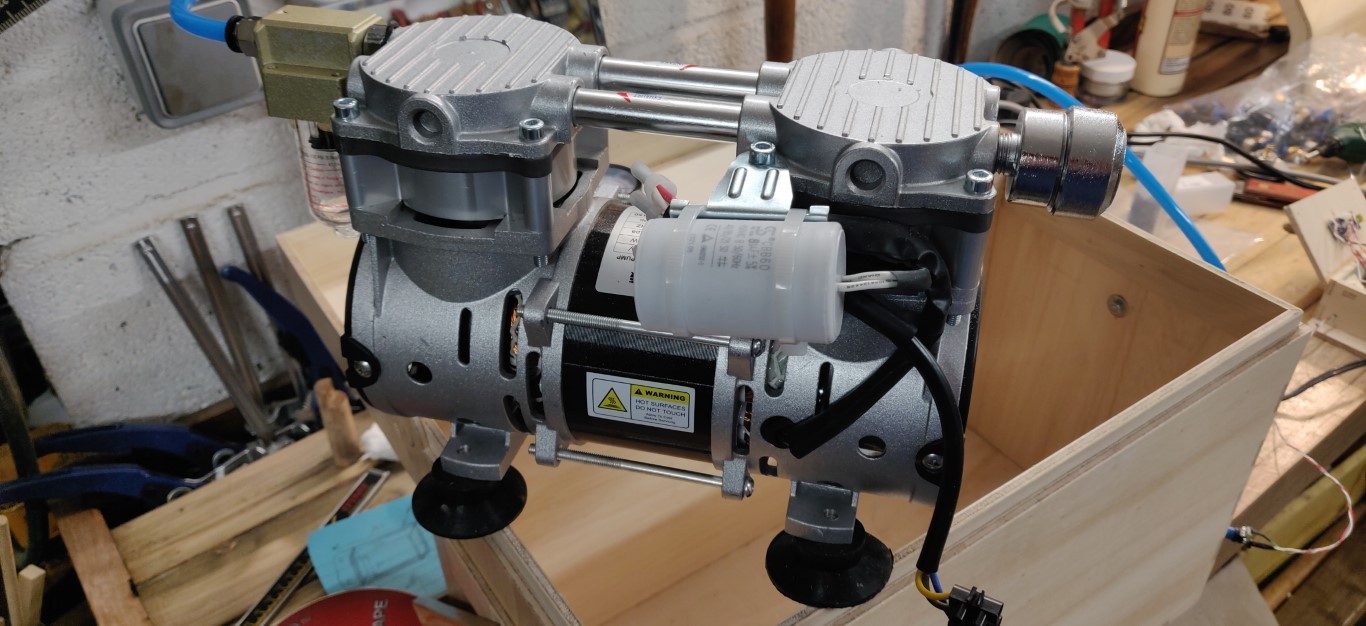
The pump
“900V” model: 110L/min, -90Kpa (= -0.9 bar / -13 psi), 360W. This pump is very quiet and can run very well non stop. It is used in various applications, ranging from medical to industry, including the wood workshop. It can be used, for example:
- to stabilize heartwood with a resin.
- to deep stain wood
- for a vacuum clamping table, for example for the workbench or the CNC table
- for a vacuum chuck on the wood lathe
- for a veneer press. This is the use that I develop here.
Components
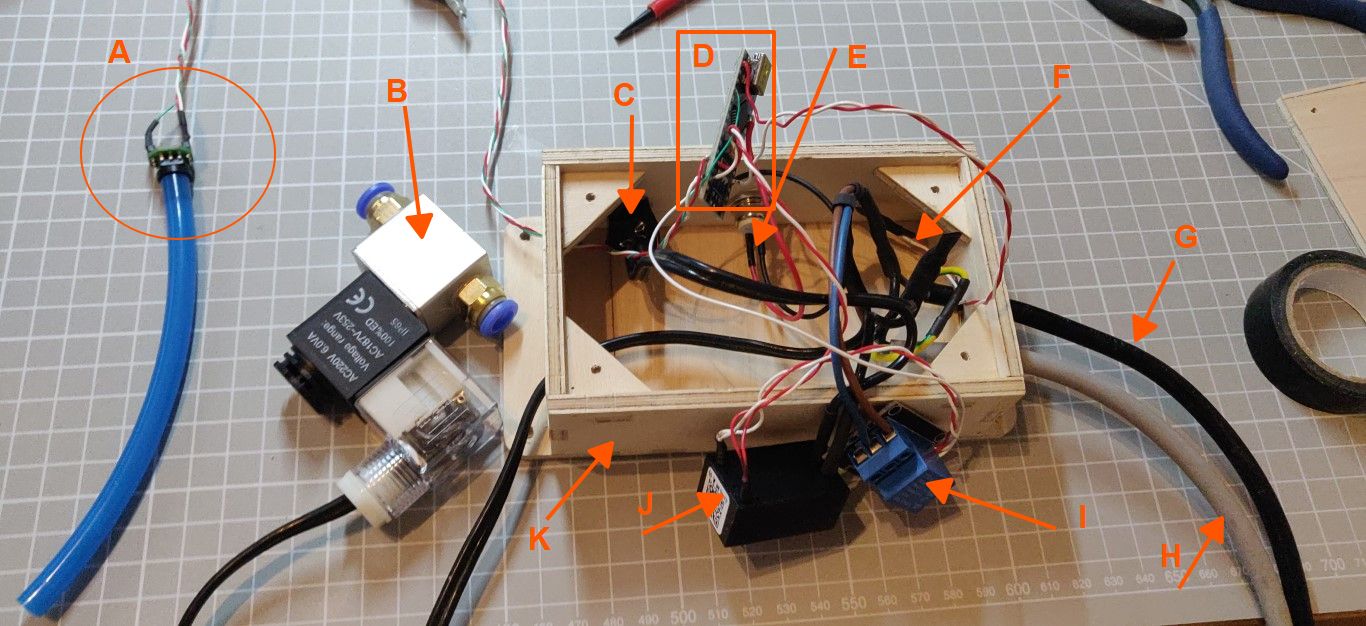
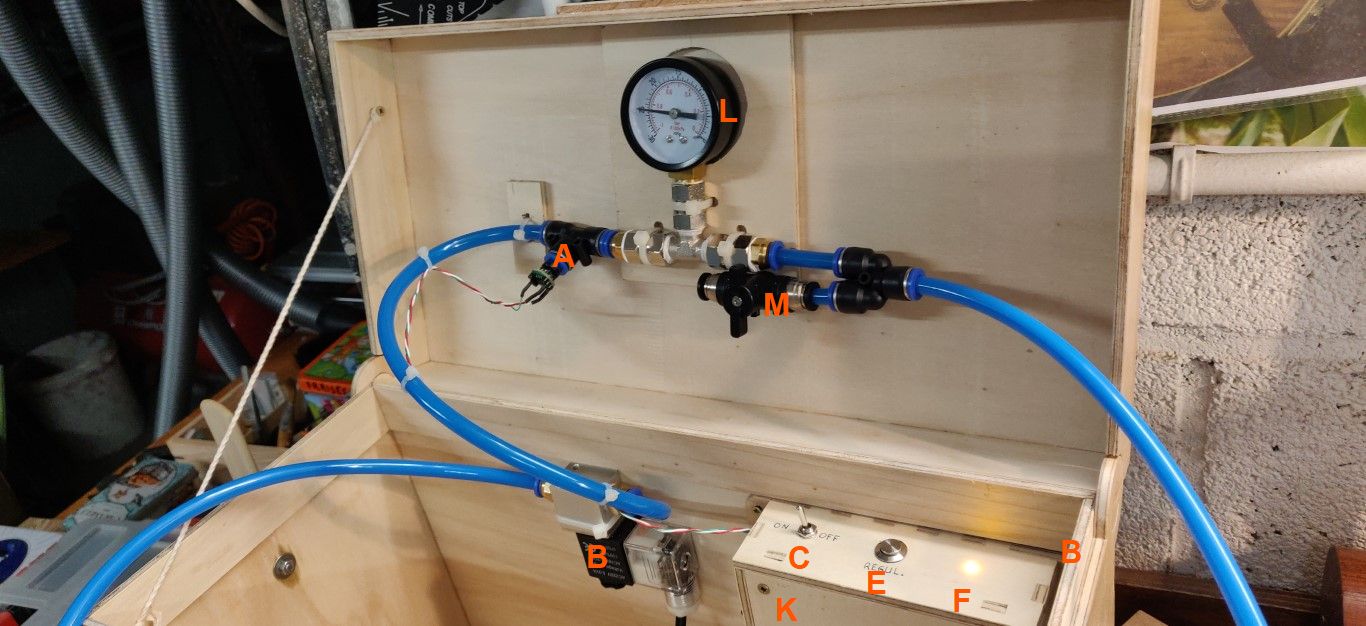
A - Negative pressure sensor -100Kpa < 0Kpa: 0.5V - 4.5V, model XGZP6847A100KPGN
B - Pneumatic solenoid valve - 220V solenoid - normally closed
C - Main ON/OFF switch
D - Arduino Nano Board
E - push button: regulation start/stop.
F - Led: regulation activated
G - 220V power supply
H - Pump power supply - 220V
I - Relay module: controls the pump and the solenoid valve in parallel.
J - Converter 220V AC - 5V DC
K - “Electronics” box generated with Boxes.py, see below
L - Negative pressure gauge -1 bar (-100Kpa) < 0 bar
M - Relief valve, allows the circuit to be brought back to atmospheric pressure
The regulation
The regulation makes it possible to maintain a constant vacuum by only triggering the pump when necessary. In an ideal circuit, once the vacuum is done, there should be no more pumping while the glue dries. In practice, the system always contains a few micro-leaks which slowly cause a little vacuum to be lost. The regulation triggers the pump again to find back the required level. The targeted vacuum level is the one measured when the push button is pressed to activate the regulation. When the regulation is not activated, the pump runs continuously. To turn off the pump, set the switch to OFF.
The software for the Arduino board is available on my Github page. See source code for pinout details.
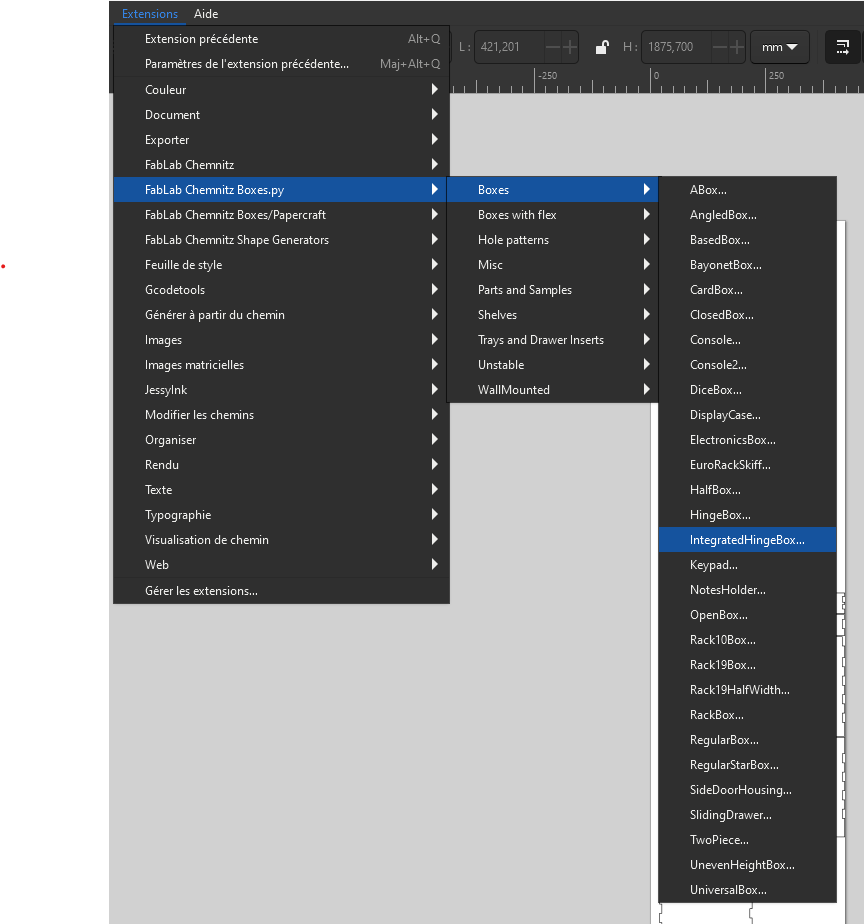
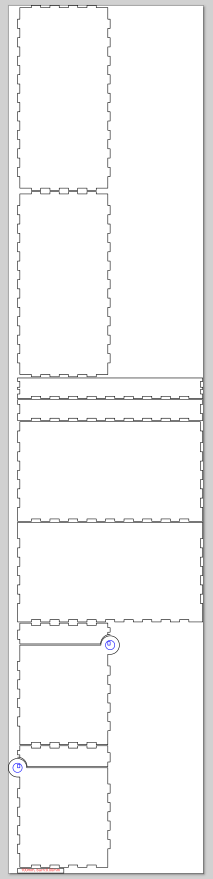
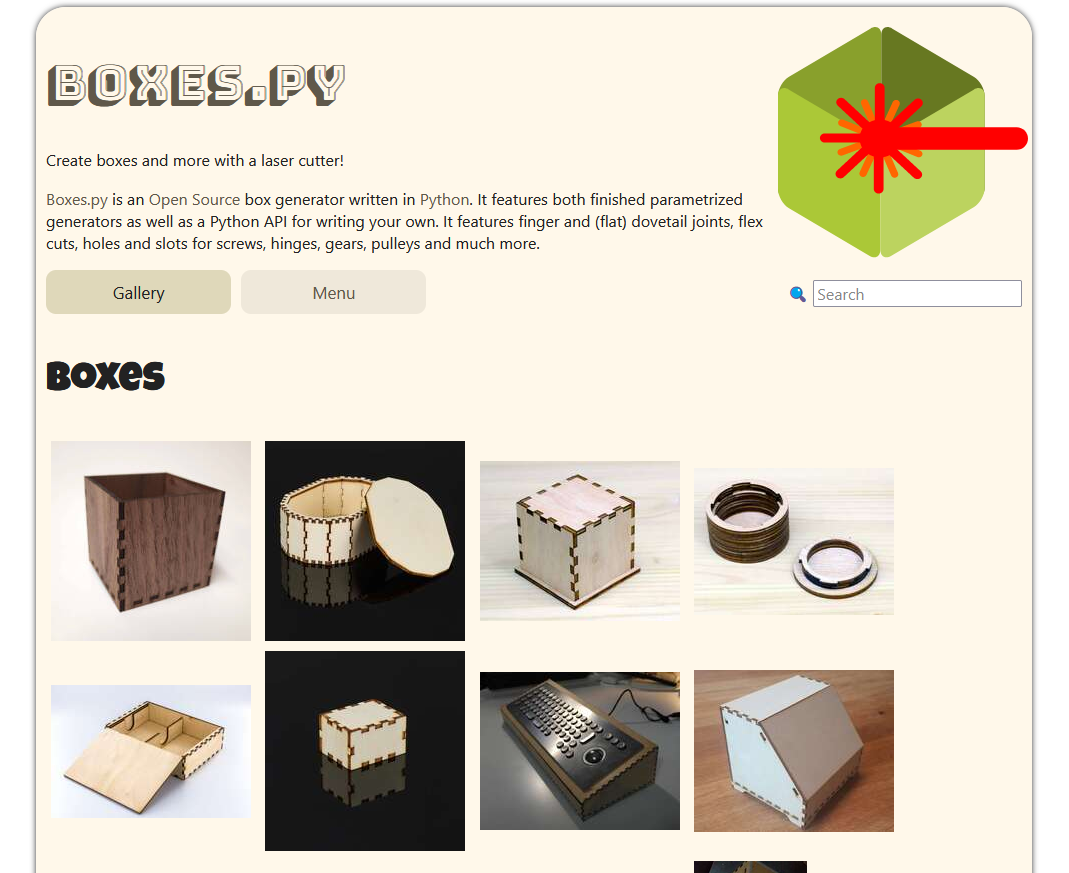
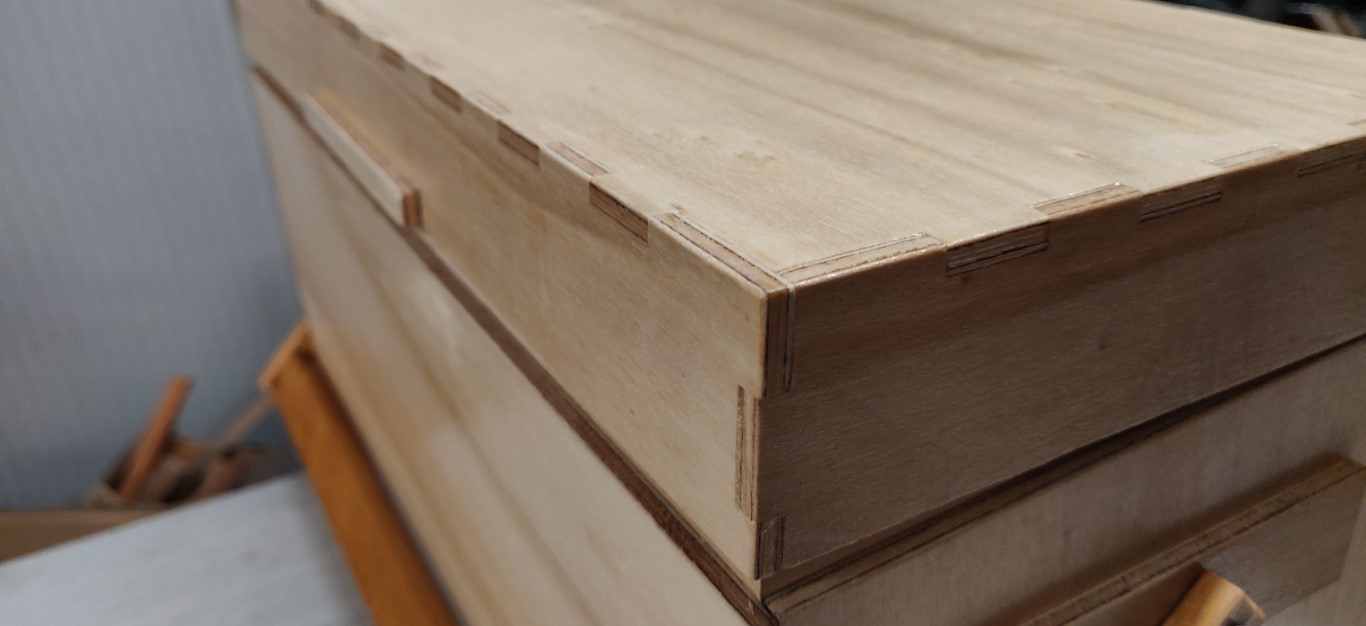
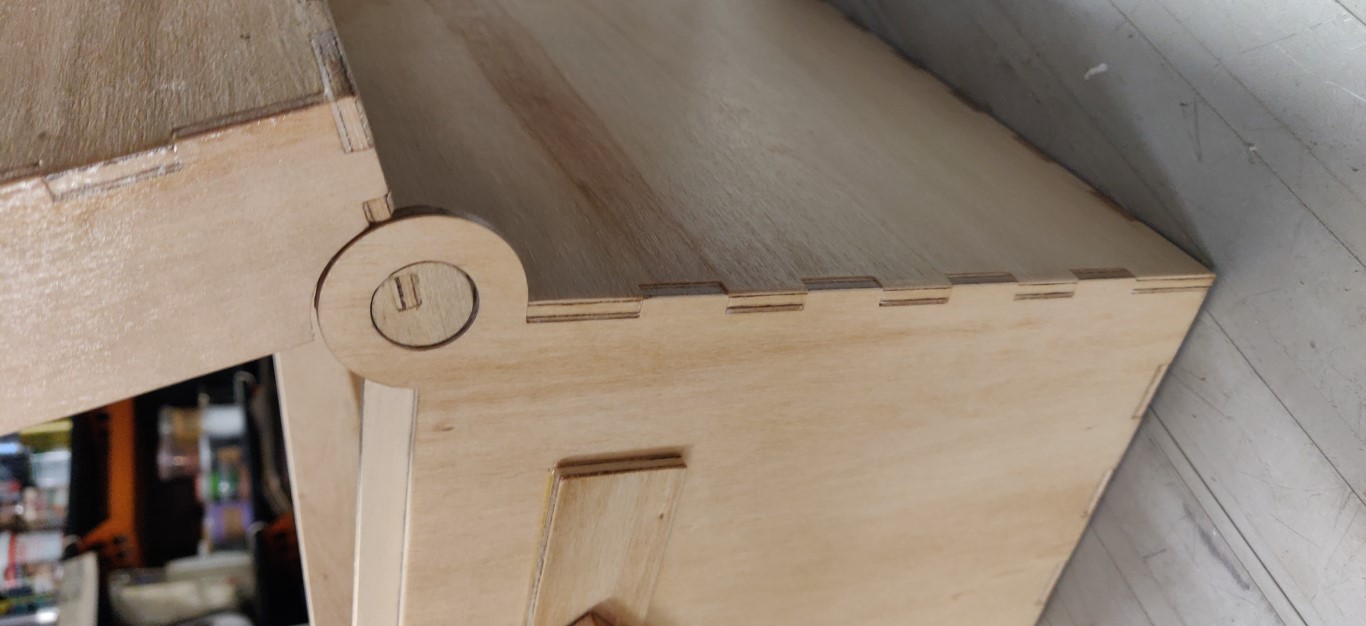
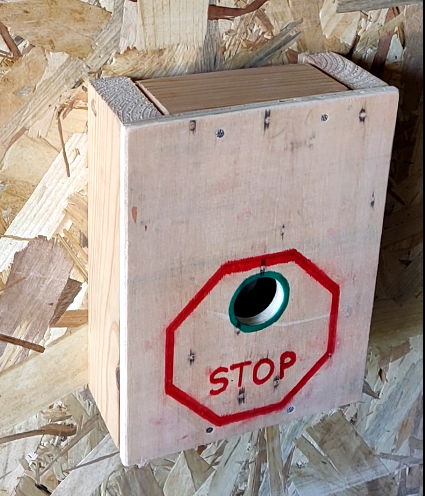
Boxes.py to make wooden boxes
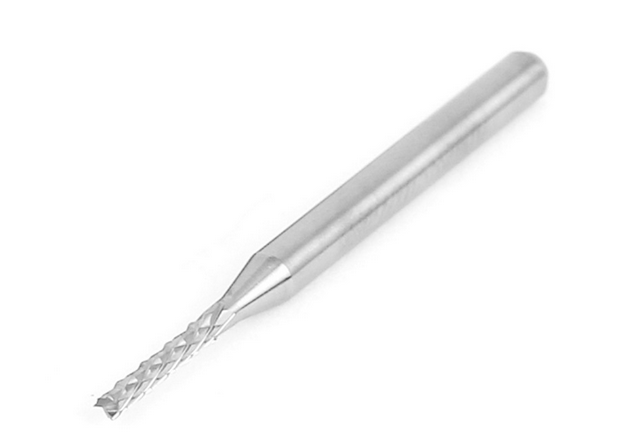
The box that hosts the regulation as well as the main case were made thanks to the “Boxes.py” project. This site that we owe to Florian Festi offers unlimited possibilities to create all kinds of plywood boxes assembled with straight tails. This project is made up of multiple generators accepting parameters and producing the vector drawing that can be directly used for laser cutting. In my case, I adapted the generated files for a CNC cut, I use a 1.5mm “corn-mill” cutter, which allows a very clean cut which remains quite fast and which requires a minimum of retouching to break the rounded corners. The assemblies are very precise and quite tight. I use 5mm poplar plywood which is of good quality and much cheaper than the birch plywood generally recommended for these kinds of projects. Boxes.py can be used on the author’s site, but it can also be used as an extension of Inkscape. See the MightyScape project which includes this extension and many other very useful ones.
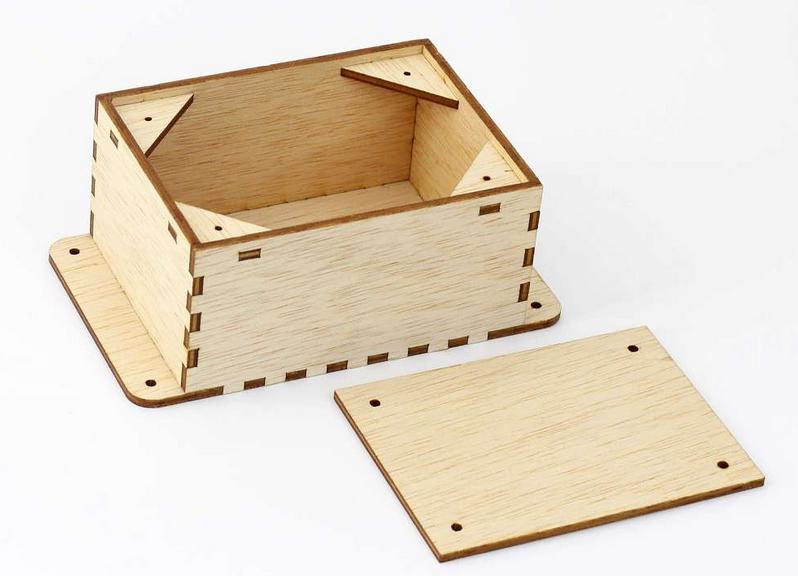

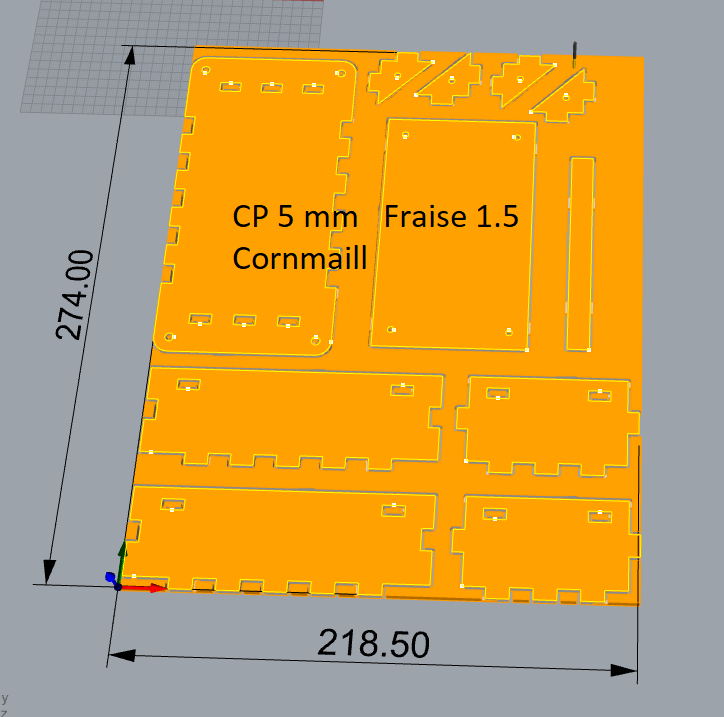
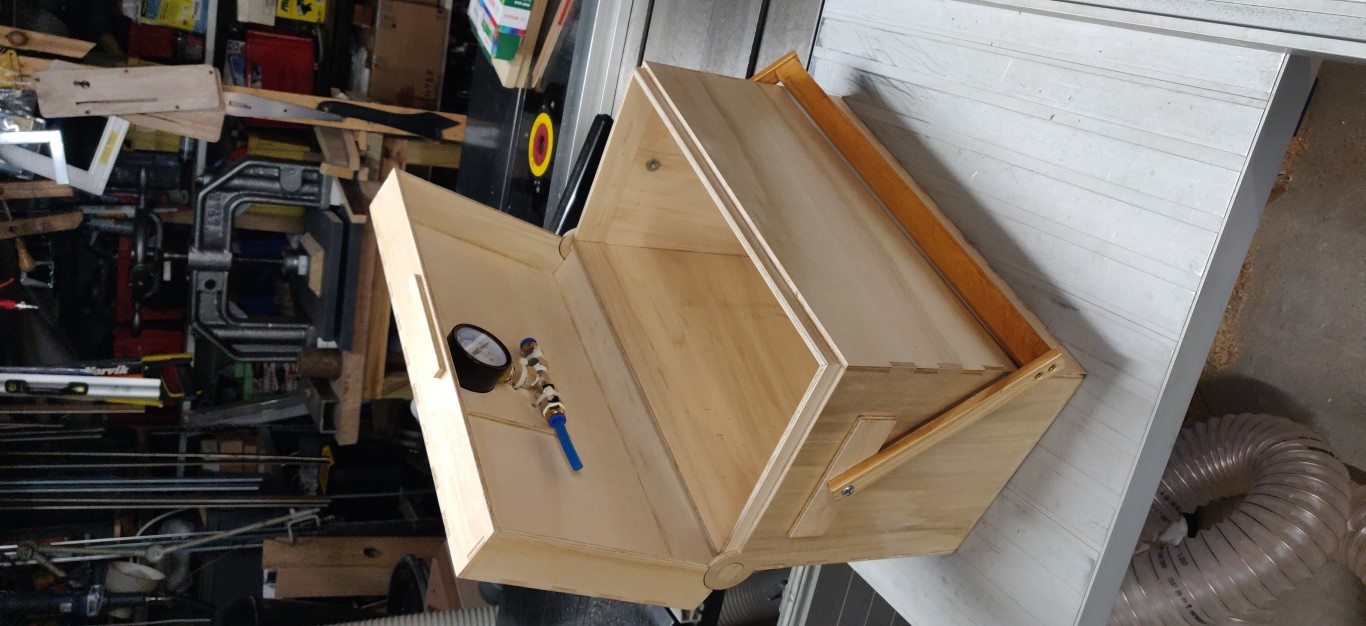
The transport box
“IntegratedHingeBox” model, 400mm x 200 x 260, lid depth: 40mm
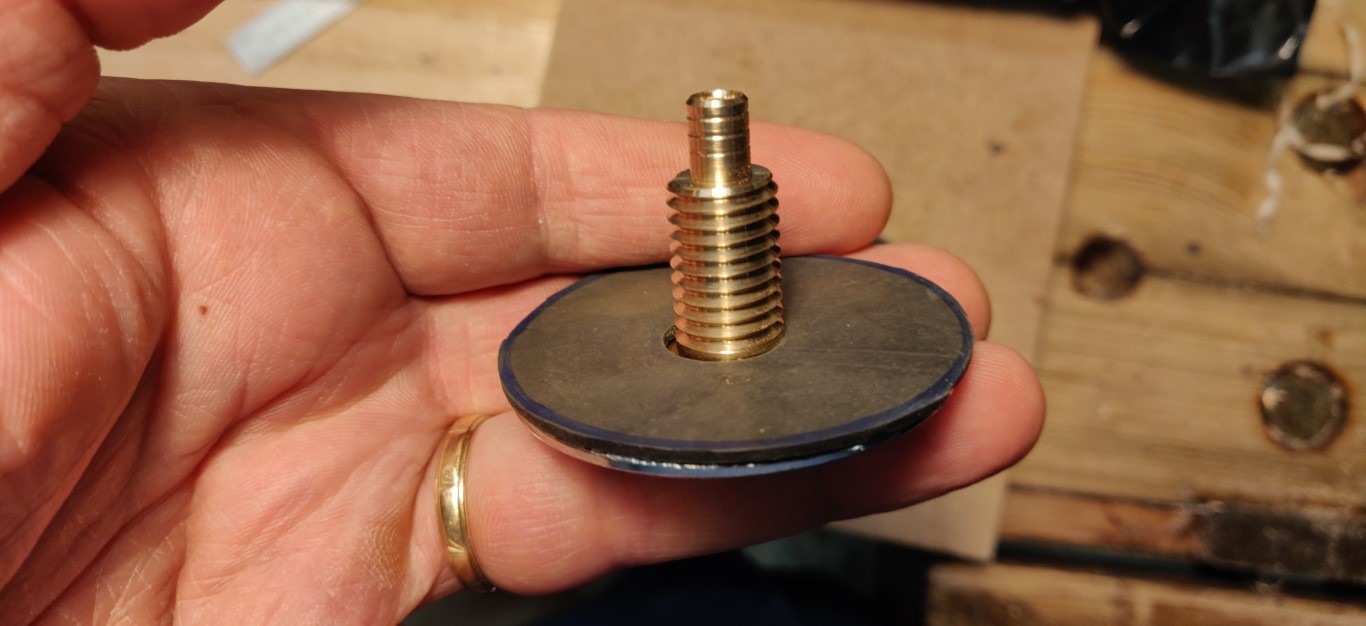
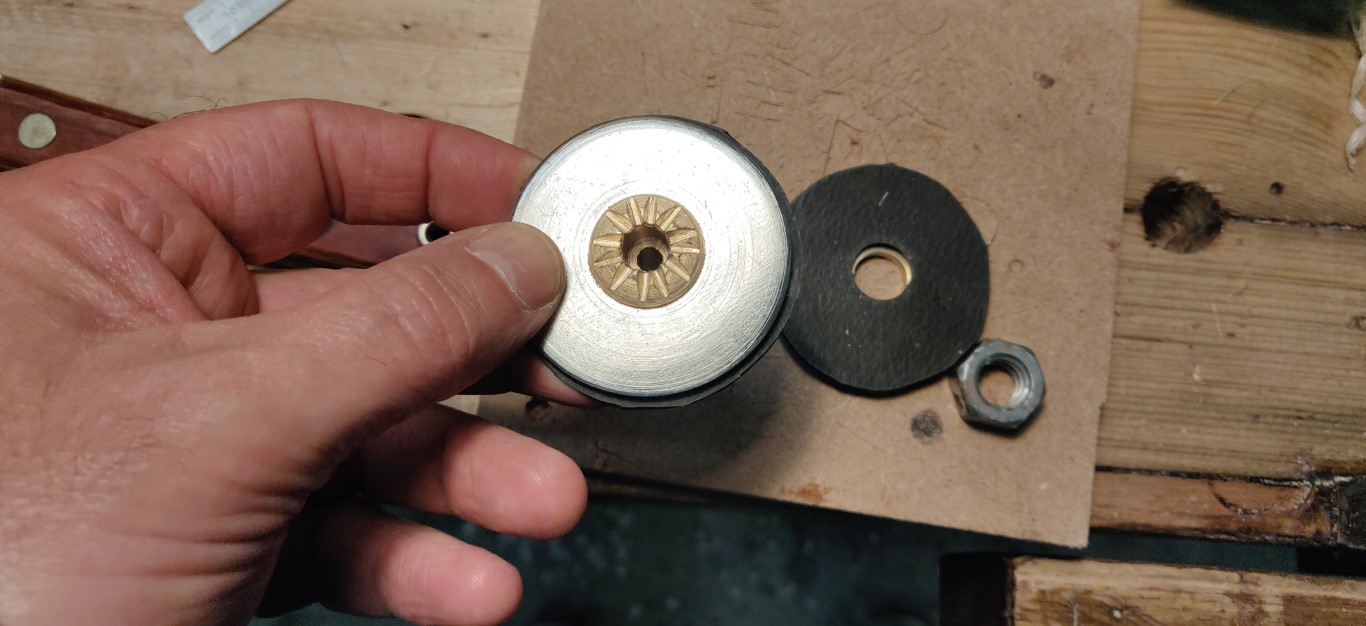
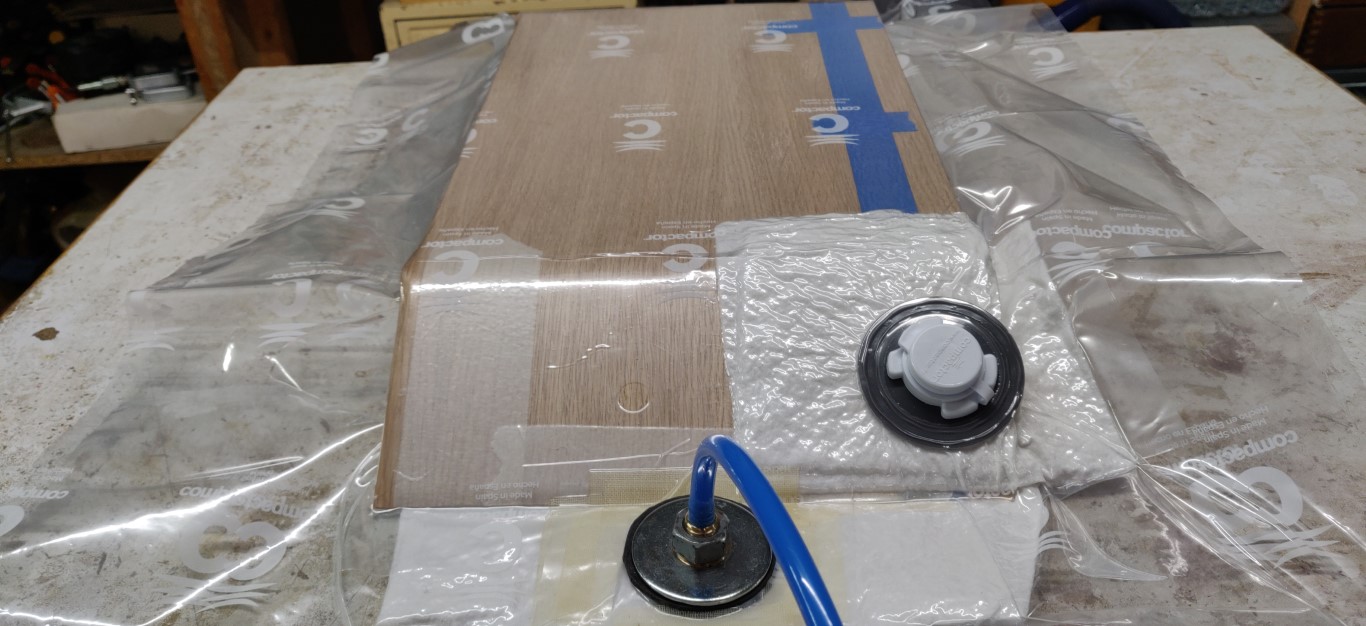
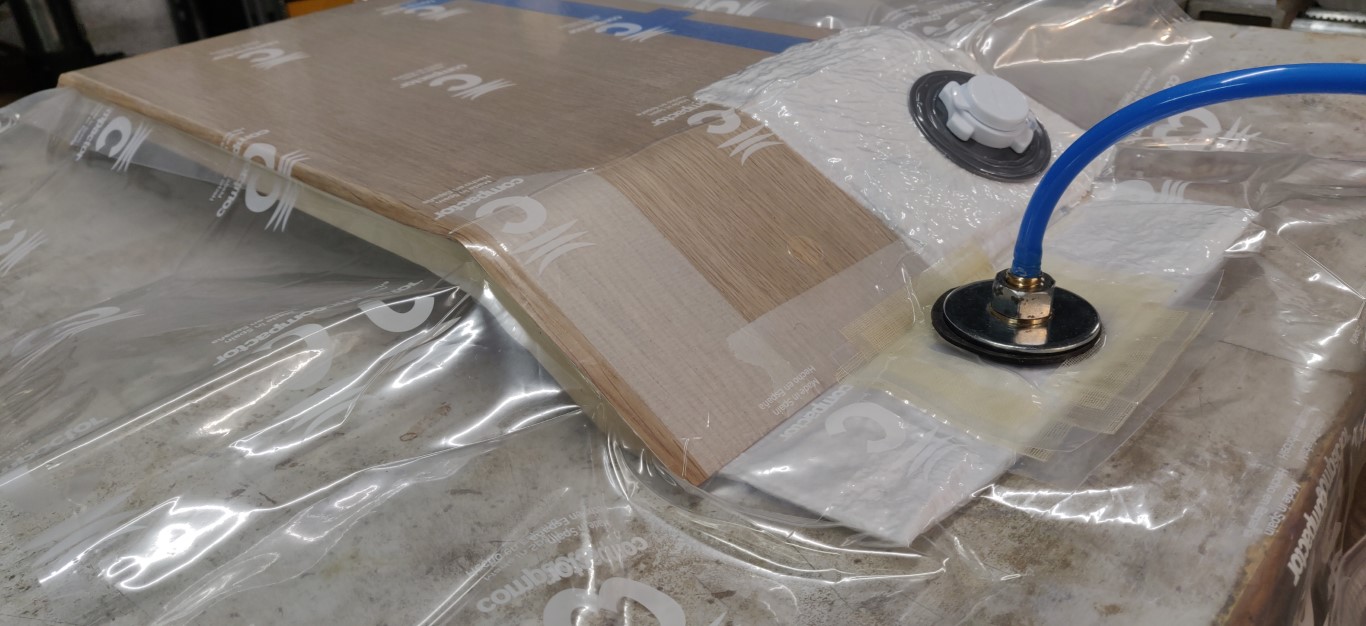
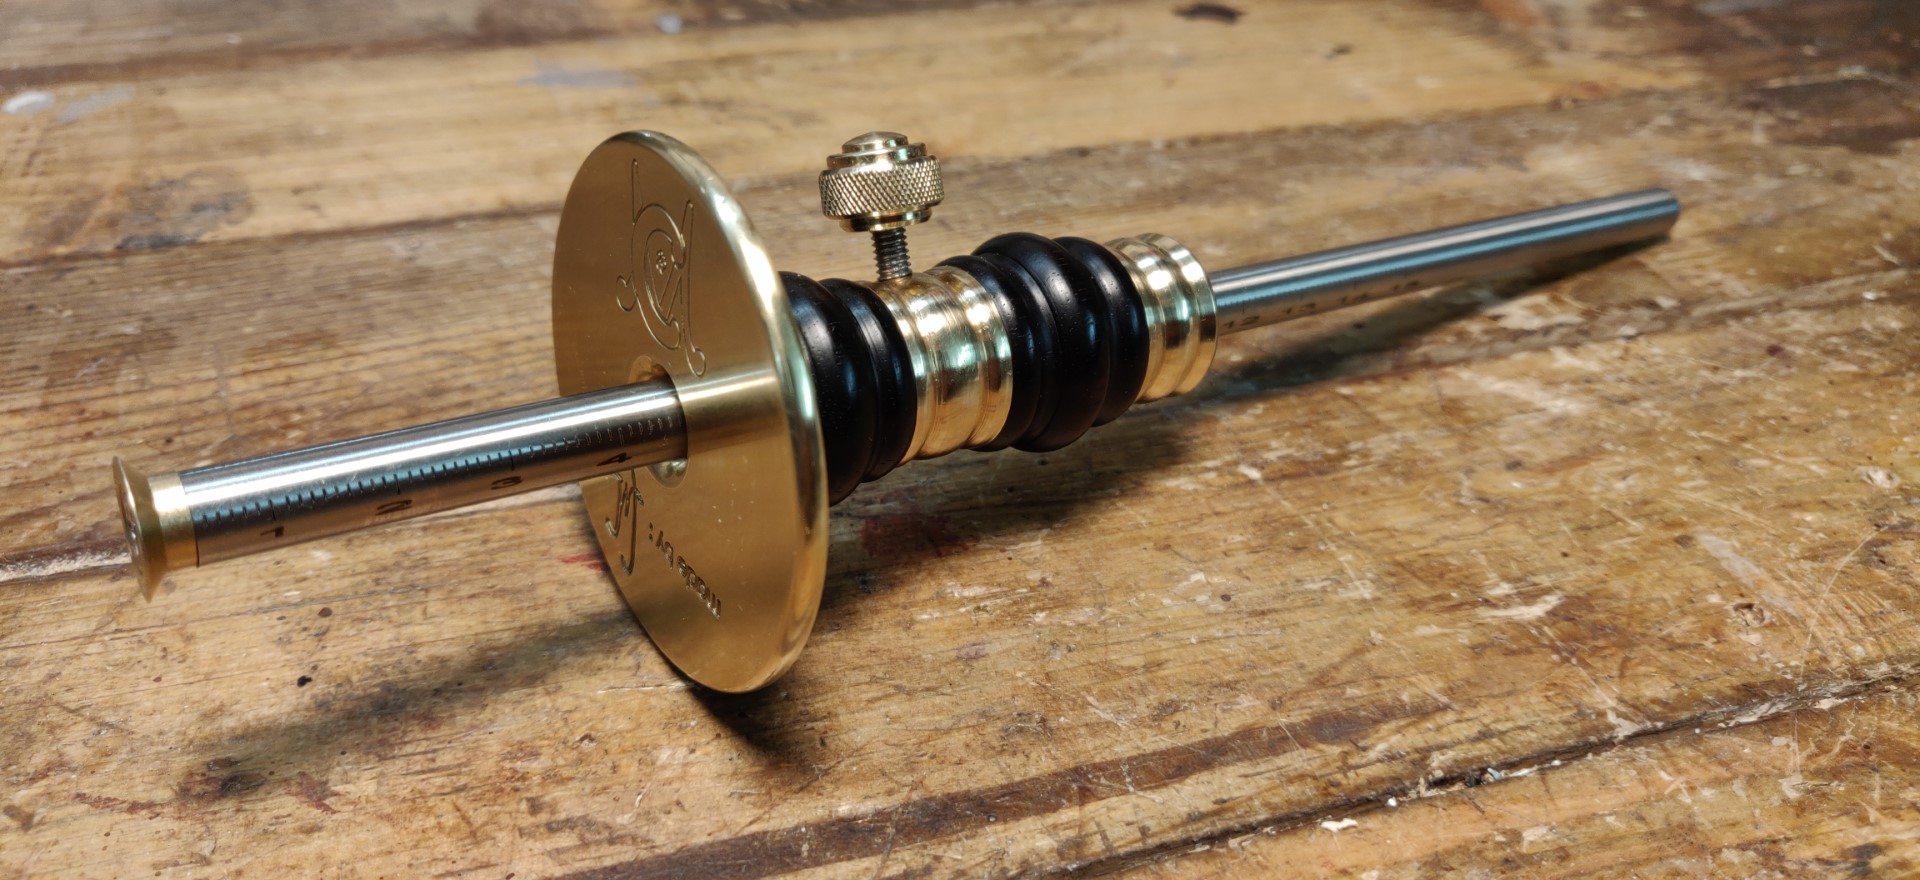
The bag connector
There are several solutions to connect the bag to the vacuum pump. I made a brass piece on the lathe starting from a 16mm blank:
- shoulder to lock and glue the bottom washer with Loctite
- M12 thread up to the shoulder for the clamping nut
- shoulder diameter 6 at the end to insert the pneumatic tube tight.
- central hole diameter 4.5
- A second washer to take the bag in sandwitch, tightened with an M12 nut
- two large sealing gaskets cut from automotive inner tubes.
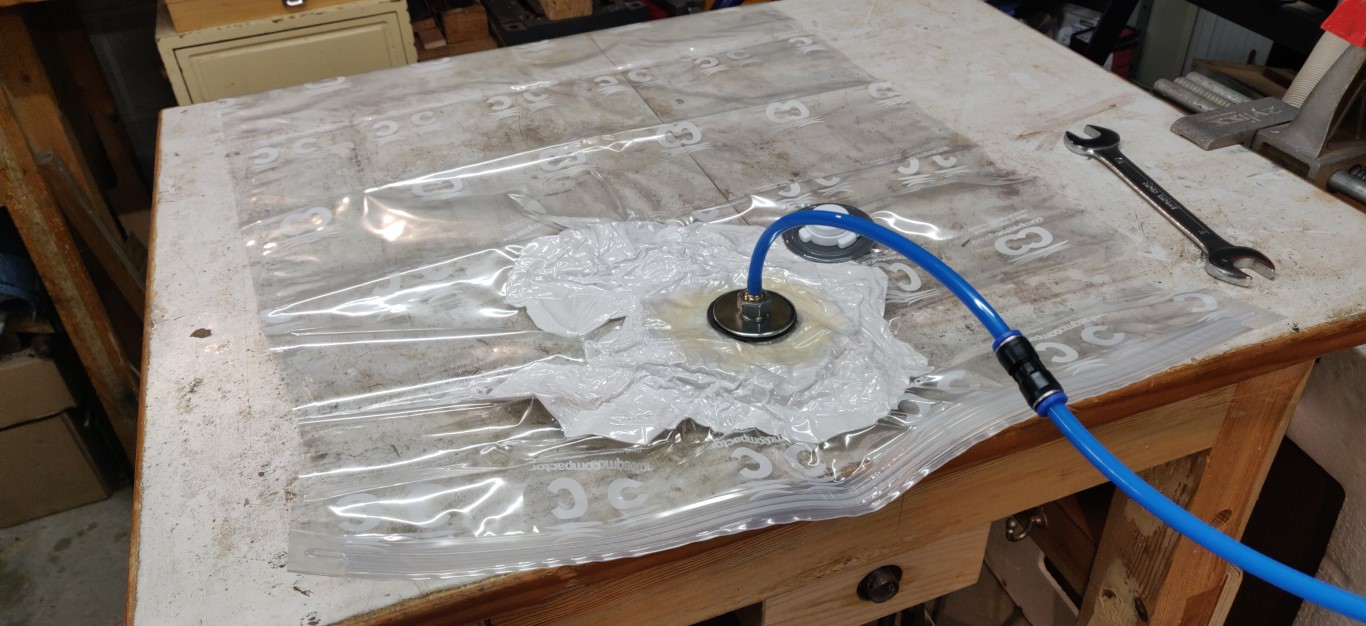
The bag
Several possibilities also for the bag, depending on the extent of the work to be done:
- The simplest solution is to use a bag that is used for compressed storage of duvets and blankets. These bags are not very thick but are perfectly airtight and inexpensive. They have the advantage of providing the solution for closure. I haven’t had much success trying to reuse the valve for a vacuum cleaner, I recommend inserting a homemade connector on an area reinforced with a piece of greenhouse tarp for example.
- make your custom bag with tarp for greenhouses. Intermediate resistance, inexpensive, sold by the meter in garden centres. I have noticed that these tarps can have small leak-generating holes. They are easy to patch, but the hard part is finding them.
- make your bag with vinyl tablecloth found at fabric suppliers. This tablecloth is very resistant and much thicker, perfectly airtight.
- For these last two solutions, the seals can be made with strong adhesive double-sided tape or a reusable tape sealant.
- The closing of the bag can be done with split 20 mm diameter electrical sheathing rods, clipped on a 16 mm rod (see tutorials on youtube). You can also simply close between two small boards tightened by joint clamps.
The solution I show below is intermediate. I use greenhoudr tarp to wrap the part, cover the protruding edges, and isolate the layers from the glue. Everything is then inserted into a larger compressed storage bag which guarantees the seal.
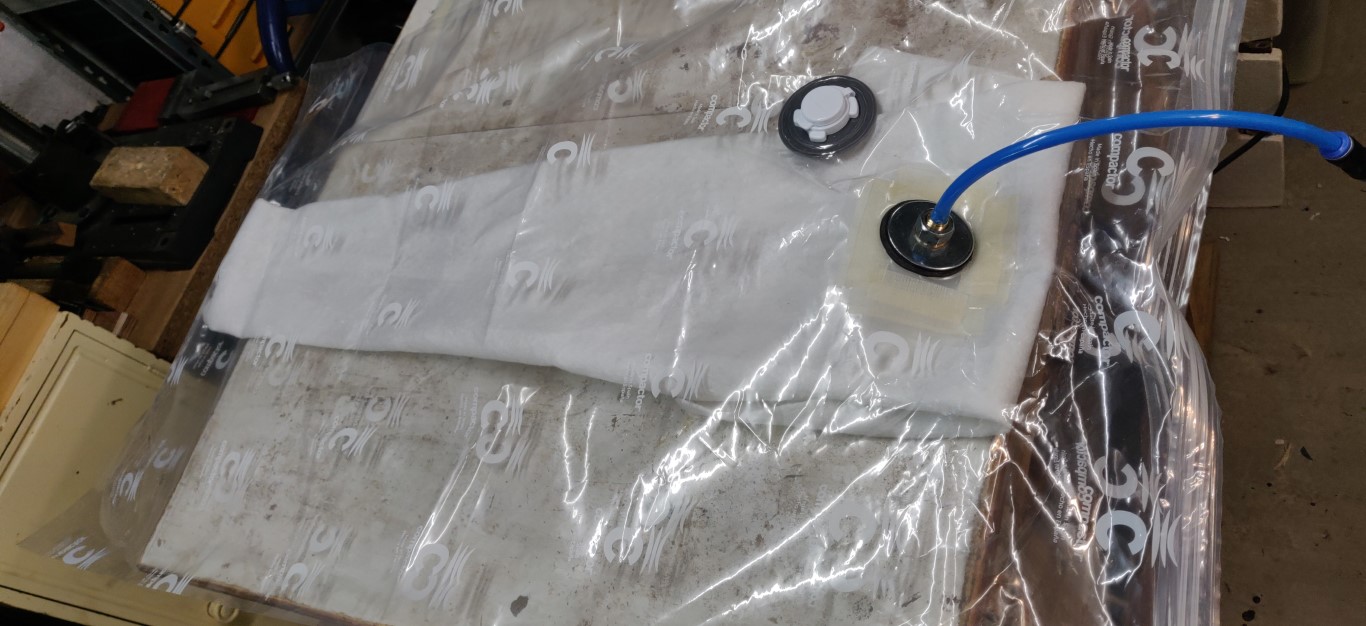
Draining material
It is important to ensure air drainage over the entire area containing the part. In the absence of this drainage, the two sheets of the bag can stick together and prevent any circulation of air to the pump connector. The simplest and most economical material to use for this is the fairly thick geotextile that can also be purchased by the meter in a garden centre. It is necessary to shape a kind of roll, wrapping several thicknesses, and to distribute it from the bottom of the bag to the connector of the pipe.

Example
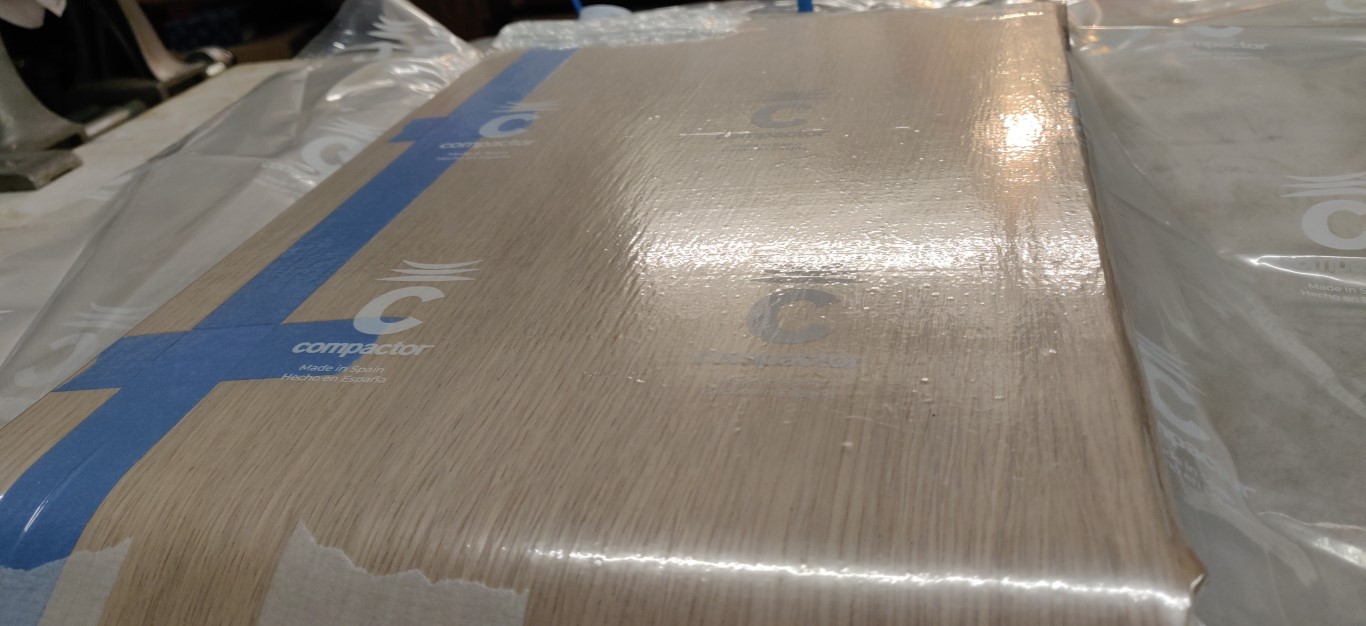
One of the great advantages of vacuum gluing is to obtain very strong bonds because the vacuum has the effect of making the glue penetrate deep into the wood. This advantage can turn into a disadvantage:
- Excess glue can pass through a delicate veneer and compromise the finish.
- Even the glue from the masking tape can migrate into the wood and the tape is very difficult to remove after gluing.
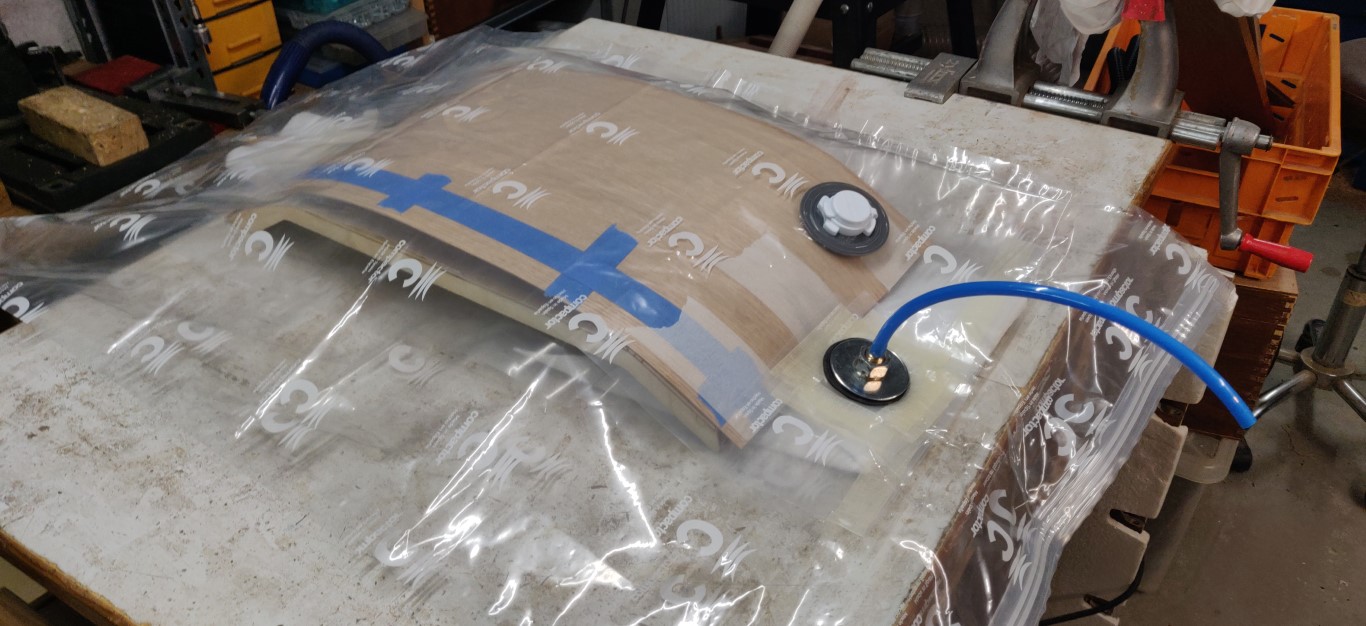
The veneer is positioned with tape only on the connector side, the veneer must be allowed to spread freely along the curve, as the vacuum is created.
Your comments are welcome !
Christophe
All contents under Creative Commons BY-NC-SA license.


Older readers comments